Thursday, December 17, 2009

Wardriving Kuwait: Listing Access Points

"Wardriving is the act of searching for Wi-Fi wireless networks by a person in a moving vehicle, using a portable computer or PDA." -- Wikipedia

Ever since I got my new mobile (HTC Hero) which has both GPS and WiFi, I've been wardriving; simply run a program and it does all the dirty work of scanning for wireless networks and attaching the geographical location of these access points (APs).

The program I use is wardrive. It's written by Raffaele Ragni and is freely available in Android's market.

A quick link to reach the full map is: http://sites.mbhbox.net. If you would like a list of only the open APs, visit the program's website: http://wardrivedb.appspot.com

The purpose of this project is to collect statistics and show a map of open and secured access points along with other things.

Don't be shy. Leave a comment. Anonymous comments are enabled.

If you'd like to contribute to this project, email me: mbhkewl TheAtSign gmail Dot com.

Monday, December 14, 2009

Facebook Privacy: Friend Lists Are Public

After Facebook's new fiasco about its new "enhanced" and "simple" privacy settings, which resulted in setting most, if not all, pictures and information to be public!

What I found today is that even if you set your friend list to be private, it's still available to the public eyes, through a swift link.

To demonstrate, I'll show an example on Mark Zuckerberg, Facebook's founder.

Here's Mark's profile. As you can see, there's no friend list available to the public. but that's OK, going to this link will show the friend list! Tada!

In case they fix this problem before you can look at it, here're pictures:


The trick applies even to numeric IDs of users.

Saturday, December 5, 2009

HTC Hero Review


Introduction


I have received my new phone: HTC Hero. The phone's operating system is Android. My previous phones were all Nokia Communicators (9110i, 9250, 9500), so I expect my phone to provide me with control and easy methods of text input for messaging and communication.

While people typically look for a cute interface, I look for functionality. Lots of it. The Hero has amazed me by having both. During this post, I'll go through about my findings, but I won't be able to provide pictures of the interface itself. There're however tons of video reviews out there and screenshots for the eye-candy hungry.

Below are my findings and notes regarding my experience thus far (4 days).

Note: You can view a clean/plain version of this post here.

Table of Contents


Specification

Hardware

HTC's page lists most of the things but not all.
  • Processor: Qualcomm® MSM7200A™ @ 528 MHz
  • Operating System ROM: 512 MB
  • RAM: 288 MB
  • Display: 3.2-inch TFT-LCD touch-sensitive screen with 320x480 HVGA resolution
  • Quad band with HSDPA support up to 7.2 Mbps
  • Connectivity: Bluetooth, Wifi (b/g), mini-USB, standard 3.5mm audio jack.
  • Camera: 5 MP with auto-focus
  • Audio formats: MP3, AAC(AAC, AAC+, AAC-LC), AMR-NB, WAV, MIDI and Windows Media® Audio 9
  • Video formats: MPEG-4, H.263, H.264 and Windows Media® Video 9
  • Battery capacity: 1350 mAh
  • Expansion slot: micro-SD (2.0 compatible)
  • Extras:
    • GPS with internal antenna
    • G-sensor
    • Digital compass
  • Other:
    • Internal phone capacity: 160 MB
    • No flash for camera

Operating System

  • Firmware version: 1.5
  • Baseband version: 63.18.55.06EU_6.35.06.18
  • Kernel version: 2.6.27-8dd6deee
  • Build number: 2.73.421.5
  • Software version: 1.0.0.A6288

Package Contents

The packaging of the phone is great and delicate, as if they're delivering an ancient wine bottle to you!
  • Phone: covered with a temporary protective sheet. The battery is also covered & must be uncovered to use the phone.
  • Earphones with soft cover cloths. Left & right earphone cables are equal in length & have Play/Pause, Back & Next controls.
  • Earphone cable holder (tiny) that snaps on the cable and holds to clothes.
  • 2GB Micro-SD card.
  • USB data cable: Standard to mini-USB.

  • AC adapter: 100-240 volts universal adpater. Has 2 circular pins and provides USB port to plug cable into then to the phone. The adapter is modular so you can remove the 2-pin head and plug a different head (only 2-pin is included).

  • Warranty, Accessory and Quick Startup guides included. Make sure you read the quick startup guide!
No pouch included.

AC adapter extra info: Input: 100-240 volts/0.2 Amps 50-60 Hz. Output: 5 volts/1 Amp.

According to the quick start guide, the phone charges fully within 3 hours. And it did!

Physical Look and Feel

  1. The phone is very tiny. It's smaller than the palm of my hand.

  2. The coating of the back-cover is neat and feels like rubber, not some cheap plastic.

  3. The touchscreen is not a fingerprint magnet. It looked better than an iPhone's screen. (Haven't seen an iPhone 3GS to compare against)

  4. Buttons: Top: Call, Home, Menu, Hangup/Power. Bottom: Search, Back.

  5. Trackball.

  6. The touchscreen looks great. I mean amazing! Even when there's sunlight.

  7. The earbuds are lite. I forgot that I had them on after half an hour and didn't even feel them.


Migrating Contacts

This is everyone's major hassle whenever moving to a new phone. I never had an issue since I moved from one Nokia Communicator to another, but since I got sick of their crappy software and each new generation gets a worse user interface than the previous, I jumped to Android.

I had taken a full backup of my phone using Nokia PC Suit and synced my contacts to Outlook Express. Both Nokia PC Suit and Outlook Express have the option to export your contacts, but both suck really bad because they export only ONE landline and ONE mobile phone number per contact.

Exporting to a Comma Separated Value (CSV) file, writes columns according to what Nokia or Microsoft wants, not according to what you have already defined inside the contacts. The fields are fixed by Nokia & Microsoft, so if you have extra fields, sorry, can't have them.

From 11 PM till 9:30 AM the next day, I was looking for a painless way to move all of my contacts, and I finally found it. Using a free program called NBU Explorer, I exported all the contacts from a full backup to vCard files: Each contact in its own vCard file. (vCard is also known as vcf). I then ran one command line in the shell which combined all these contacts in one file, then I uploaded that one vCard file to a GMail account to sync with the phone.
  • Linux: cat ./* > ../contacts_all.vcf
  • Windows: Start -> Run -> cmd -> cd C:\path\to\contacts\directory, then type:
    copy /B *.vcf contacts_all.vcf
When you first run your phone, it will ask you to sign in using a Google ID (or a Google App ID) and it will sync the contacts to your phone from that account. This is great because if I format the phone, or get a new phone, it will sync the contacts from my GMail account. I'm no longer dependent on a computer.

You could also sync the contacts to your computer in addition to your gmail account.

WARNING: HTC Sync tool only works on 32-bit Windows.

If you don't want to create a temporary Google ID (which you can't selectively delete -- it has to expire by itself after 9 months or so), I'm willing to create you a temporary ID to sync your contacts to, then to your phone, then to your computer. After you're done migrating, I'll delete your account from my domain. Email me if you'd like that.

First Run Problems

When you turn on the phone for the first time, you'll be asked to sign in to a Google ID, and if you don't have one, create one.

I did the mistake of signing in with my personal GMail account. It synced 605 email addresses, none of which had phone numbers, to the phone. I deleted the first 6, only to realize that they were also deleted from my GMail account!

Since I run Google Apps on my own domain name, I created a new username and imported the contacts to it. Then I had to factory-reset the phone to be able to use the new ID. There's no option to change the phone's main ID. A factory-reset is the only way out.

To change your Google ID on the phone, Go to Settings > Applications > Manage, then look for all Google's programs (Gmail, Google Apps, Maps, ...etc.), open each and clear the data. When you're done, open the gmail application from programs menu and it will take you to the sign-in wizard.

After you login to your Google account, go to Phone > People > Groups, then Menu and choose Sync Groups. You can specify which groups to synchronize to your phone.
You can also import all your contacts to a specific group using the web interface.

Boot up and Shutdown

Shutdowns in 2 seconds. Startup takes 1:04 minute.

I had to shutdown twice due to some programs that I downloaded and froze the phone. Watch out from incompatible programs!

Adapting to the Touchscreen

I never had a touchscreen before and feared that my typing would be hindered by it by not having a physical keyboard, but I was mistaken. Using the phone in portrait mode was easy enough, but using in landscape was freakin' amazing! I was typing quite fast on it, and you don't need to fear typing mistakes in either mode because auto-correction and word-suggestion are there for the rescue.

It took me about 2 hours only to fully adapt to the touchscreen. There's a calibration option in the phone, too.

WiFi and WEP Problems

I have an Access Point (AP) at home configured with WEP security, using a nonstandard Encryption Key Index. You have 4 index keys, and #1 is the default. I was using something else, and couldn't connect to the AP because of that. There was no option to select the key index manually.

I haven't tried 3rd party applications from the application market. I instead configured another AP with WPA-mixed and connected just fine. I'll be configuring that first AP to WPA anyway, so it's not a big deal.

I did search online about this problem and turns out I wasn't the only one suffering but didn't find a quick solution and it wasn't worth all that trouble anyway. WEP can be cracked in less than 15 minutes, so yet another reason to ditch it.

User Interface

The user interface (UI) is custom made by HTC, and provides many custom widgets which aren't available by default to Android. There are similar widgets, like the Clock Widget, but Sense UI offers a large collection of clocks to choose from.

Apart from looking good, it makes accessing functions quite easy and integrates various services into a single place. To sum it up: Sense UI improves the usability of the various options in the phone.

With all this glory, people have been complaining that it consumes a lot of memory from the phone. I wasn't able to find out how much exactly it was consuming, but the total free RAM available after a fresh boot is 100 MB, with all system services running (default apps).

With just 100 MB of free RAM, applications are still very fast to launch, and the whole system is quick to switch between tasks.

The features I'll go through in the UI in later sections may or may not be exclusive to Sense UI. I have no definite way to tell them apart.
  • One feature that seamed to wow the Apple crowd is the unlocking and password protection: You drag a bar to the bottom and then for a password, you draw a pattern on the screen. (My reaction was: Oh cute. Their reaction was: ZOMG! I LOVE IT!)
  • The weather & world clock default widgets were quite useful. World Clock allows you to add other countries/cities which is handy since I deal with companies in UAE & USA. The weather widget allows you to add other countries/cities too.
  • SMS messages are consolidated; messages between you and a person are stacked up together and are viewed as a single entry in the general view, rather than list each message separately (and having to scroll endlessly!)
  • When adding icons to a screen that is full, it asks you to drag the icon to another screen with free space, rather than just show an error. But if you'd like to switch the location of 2 icons (same screen or otherwise), there's no swap option; you'd have to delete one, move the other & re-add the first.
  • When typing an email, the keyboard includes a ".com" button to avoid the hassle of typing those common last 4 chars.
  • Links and numbers are auto detected in SMS messages. Clicking them would bring up the proper dialog to add/call/message/browse.
  • When inside some program and an SMS is received, it's displayed in the taskbar at the top. First it shows the sender's name, then shows lines of the message itself. Convenient since you know who & what was sent and if not important, you don't have to exit/switch from your program.
  • Character count while typing an SMS only shows when exceeding one message size (140 chars for Latin chars).
  • No confirmation is shown (and no option for it) when sending a multi part SMS. I like the challenge of squeezing whatever I need in the least amount possible ;)
  • When viewing contact groups you can send a group SMS or email with a click.

Multimedia

This section covers music, flash, youtube and pictures, each separately.

Music and Audio

I installed a file-manager application and used it to open an mp3 file. When I switched to another screen, audio stopped playing. When I launched the same audio file with the music player application, then switched to another screen, it continued to play and showed the status "playing" as an icon in the taskbar at the top.

You can create playlists and add your audio files to it. Even when the phone is locked, you can still play/control the playlist using the controls on the earphones' cable!

The phone's speaker is a mono speaker but it sounds really great! Multimedia files play just fine and the volume is good, but the ringer volume is a bit low even when you max it. You could work around this by increasing the volume with a sound editing program on your ring tone file. (Personally, I find the ringer's volume just fine. That was a friend's complaint).

Flash

I browsed youtube and other websites that have flash contents and was able to play videos and flash content without issues.

If you're browsing youtube, you're better off using the youtube application rather than the normal browser since the video quality in that application is far superior.

While playing videos using flash over a browser, the screen locked. An inconvenience if you watch flash-videos over the web, but can circumvented by disabling screen auto-lock & sleep.

Youtube

I played full high definition videos from youtube at 1080p of The Dark Knight and Transformers. Both played without stuttering (after pausing to let it buffer).

The video quality on the youtube application was amazing! Videos looked a bit fuzzy on the flash player of the web browser.

Videos play in HD format by default on HTC Hero. You have to press Menu button then select normal mode if you wish so.

Pictures

I went for one of my usual early morning walks on the beach and ceased the opportunity to try various features in the phone: The camera, GPS and media sharing.

I snapped this picture on sunrise and you can see the timestamp (optional) and on the right side a map showing the location of the image. The GPS takes some time to get the coordinates at first.

The camera application has simple zoom functionality and auto-focus on the area you want by tapping on the screen at the object you wish to be focused at.

When I got home, I connected to my wifi AP and opened the albums application, viewed the pictures, and then clicked the share button. It showed the option to share over these services:
  • Facebook
  • Flickr
  • GMail
  • HTC mail
  • Messages
  • Peep
  • Picasa: Whatever albums you have + DropBox.
  • Youtube
The lens isn't too great even though the resolution is high, but it's good enough.

* A common misconception is that the higher the MegaPixel rating, the better the picture. the pixel rate affects only the max resolution of the picture. The picture's clarity depends on the camera lens itself.

The albums app allows for sharing, cropping, rotating, and showing the pictures in a slideshow.

WARNING: The Media Uploader app doesn't work with non gmail.com IDs. If you're using your own domain name with Google Apps, you'll have to create a gmail.com ID.

Browsing

  • The browser is as fast as Firefox, or a bit faster. Almost all the sites that I visited had everything displayed properly; yay standards!
  • If you want to zoom, use 2 fingers (multi touch glory) and either drag them closer to each other to zoom out, or away from each other to zoom in.

  • After zooming in or out, text auto re-wraps to fit the screen. No more scrolling sideways! As far as I know, this is specific to Sense UI.

  • Google Docs opened without issues in the browser.

Contacts, Email and Calendaring

I grouped these together because whenever you add an account, you always have the option to synchronize all.
  • When creating a new contact from an unknown number or adding it to an existing contact, the contact's name appears immediately instead of "unknown" in the call history.
  • When creating a new contact, you can save the contact on your Google account, Phone, SIM card or Exchange account. All my contacts are on my Google account on my own domain (not my personal GMail account). See migration section for details. You can also link directly to Facebook and pull a profile picture for use.
  • You can choose how to display the contact's name: "First Last" name or "Last First" name.
  • Contacts can be linked (and auto detected) to Facebook and Flickr. It will also pull the profile picture and birth date from Facebook. I don't have a Flickr account to test it.
  • If the contact's birthday was near, it shows a notification in the Social Network section of contacts and tells you to tap on it to send a greeting: Call Mobile or Send message.
  • Calendar allows the first day of week to be either Sunday or Monday.
  • Calendar has multiple views: Month, Day & Agenda.
  • Agenda can be displayed Event Wise or Time Wise.
  • Multiple calendars can exist and be synced.
  • Adding a new calendar event is a click away. You choose which calendar to add the event to, what it is, duration of event, location, description, flexible reminders and whether it's a one time event or a repetitive one.
  • Reminders are fixed values. Custom values are not possible. It starts from: None, 5 minutes, 10, 15, 20, 25, 30, 45, 1 hour, 2h, 3h, 12h, 24h, 2 days and 1 week.
  • Event Repetitiveness: One-time event, Daily, Weekly (shows which day), Monthly (Every first {day}), Monthly (On day number) and Yearly (exact date).
  • The yearly event says: Every Saturday, December 5th 2009 (for example). This is a bit misleading, as next year Dec. 5th may not be a Saturday, and why was 2009 included anyway? It's redundant.
  • You can create one Exchange account only. By default it's setup to fetch every 15 minutes, but you can set it to use the Push feature where it fetches emails as soon as they arrive to the inbox. This works on Google Mail accounts as well (gmail and Google Apps).
  • You can create multiple IMAP/POP accounts.
  • You can send email and use gtalk with your device's Google ID using the built-in GMail and GTalk applications. They don't allow you to change the ID.

Battery

The battery charges in 3 hours, as stated in the quick start guide. I use the AC adapter rather than my computer's USB port, because the AC adapter outputs 1A current, while a USB 2.0 port supports a maximum of 0.5A. This means the AC adapter charges the phone faster.

Battery life becomes poor when enabling GPS and Wifi together (lasts less than a day). GPS is known to be power hungry.

I was able to extend the battery life to 2 days in a single charge by selecting an option to connect to 2G networks only, and mild use of wifi but no GPS.

For an extra mile of battery conservation, I also have a program to list other apps running in the background and kill them. This frees memory and since the processor isn't busy with background tasks, it consumes less power.

By default, wifi will disconnect when the screen is locked. You have 2 more options: Never disconnect when connected to power/computer and to Never Disconnect.

Enabling the Push feature on an Exchange account may affect battery life. Google suggests that you set it to pull every 30 minutes instead.

Essential Applications

I found some applications that I consider essentials and suggest that you install them as well.
  • Abduction! game. HIGHLY ADDICTIVE!
  • OI File Manager
  • SambaExplorer: Access Windows shares and download files
  • Shazam: Listens to music playing & identifies the track. It detected Mario Bros Overworld track! XD
  • TaskPanel: Lists and kills background apps. Can be configured to auto kill background apps
  • Ultra Notes: I take a lot of notes. This prog makes it easy to write them and later SMS/email them
  • DailyStrip: Follow your favorite comics! Dilbert, ftw!

Other

These are features that didn't belong elsewhere:
  • Phone vibrates once when a call is picked up. No need to keep holding to your ear waiting for an answer!
  • When the battery is low, the charging orange LED blinks once a second instead of flashing the screen. Nokia's communicator would flash the screen and make beep noises, draining even more precious power!!!
  • Trackball has white light. Light can be configured for notifications.
  • When an SMS is received, the phone rings and the trackball flashes smoothly in white. The screen stays turned off. (great power saver).
  • You can put a phone call on hold or mute it.
  • I recommend that you press the home button once a call is established to avoid ending the call by mistake by holding the phone close to your cheek.
  • Accessing the micro-SD card slot requires removing the cover only not the battery.

Conclusion

I love the phone, software and hardware. I find the fact that 180MB out of 288MB are gone annoying. I may switch to a vanilla (non-custom) Android interface just to see how much memory I'd save and whether I'd lose a lot of functionality or not.

I'm not happy that HTC's Syn program is restricted to 32-bit Windows only, but for whatever I'm synchronizing, it's already on a Google ID, so I'm not depending on a machine and fearing loss in case of a disk crash or a format.

Monday, November 16, 2009

SPAM: Economics and Prevention

SPAM is unsolicited mail delivered to you, wasting your time and consuming resources. This applies to both physical mail and electronic ones (email).

While you're typically protected by laws against physical SPAM to a certain extent, email is uncontrollable and has been on the rise ever since it started some time in the 1990's.

Many preventative measures have been taken throughout time to fight email SPAM, but it has only worked on marginally classifying and separating your email from SPAM.

One should ask: Why do we keep receiving SPAM? How come it never stops?
A simple answer is that it's being funded!

The rise of malicious software known as worms has given the option for mischievous companies or groups to take control of thousands of user machines and use them to send SPAM to millions of users around the world.

Those shady companies or groups are charging money to promote products of other companies. Mostly drugs but may include promotions to other products.

A simple conclusion is that if you penalize companies that pay for shady groups to use such abusive methods, SPAM would almost disappear.

If governments that house such companies refuse too cooperate, ISPs worldwide can contribute to major SPAM reduction by making it a national law to ensure that your computers at home and company are clean.

ISPs can monitor traffic patterns and identify malicious traffic, after that, it should be obliged to notify users that are suspected to be infected and as such, those users must clean their machines or be fined, and if they don't comply, inflate the fine and so on.

When taking such measures, governments allowing shady companies to operate and pay for SPAM groups to run can be blacklisted, by blocking all IP addresses from that country.

This has another powerful side effect: When blocking IP addresses of a whole country, businesses in that country will be severely affected and will demand law enforcement of criminalizing the offenders responsible for SPAM and those funding it.

Sunday, November 8, 2009

Companies And The Love of Proprietary Formats

I mentioned in an old post how to extract SMS messages from a Nokia .NBU backup file. Today I had to suffer, and sacrifice 2 bunnies and a goat, to get 1 SMS messages that was saved in the Drafts directory in one of the backup files I had of my, piece of crap, Nokia 9500.

The reason I couldn't use the same software in my old post is that it couldn't see the Drafts directory, and since Nokia had decided to create its own format for backup files and NOT provide ANY extraction functionality, I had to look for programs to do that for me.

How long has it been for companies like Nokia in the market so far? Or for any mobile phone maker company for that matter? For the sake of simplicity, let's say 5 years.
In those 5 years, I'm yet to see a company that makes mobile phones, and provide software that properly backups, restores and is able to extract data from those bloody backup files!

I could never understand why such companies decided to lock up OUR data in a weird format. To make it worse, they won't even provide decent functionality in their crippled softwares!

Apart from Nokia's mindless lack of extraction features, Sony has decided that SMS is not important and as such, it will not be backed up for you. Oh, guess what, you won't notice until after you've formatted your mobile and in the process of restoring what you think is a backup.

My sister had lost all her SMS messages because of such idiocy. Luckily, she didn't have messages with critical information. Learning from that lesson, I searched for FREE software that did a proper & decent full backup when the time came to backup my mom's mobile. (My mother would've slaughtered me and grilled me if any of her messages disappeared)

I seriously don't understand the mentality of the monkeys that take decisions on locking the data format. You'd think they might sell other software that provides the lacking features, but they'll be happy to prove you wrong and tell you that you can't get your data unless you restore it. If you are able to.

In the end of this rant, I'd like to say to both Nokia and Sony: Burn in hell you idiots. I'll never buy a phone from you ever again.

P.S.: I used a program called NBUExplorer to extract an SMS from the Drafts directory, which was in another proprietary format (.VMG). I double-clicked that .VMG file and it opened with Nokia's PC Suite and I copid the text to a normal text file. NBUExplorer is free & open source.

Wednesday, October 28, 2009

Facebook Privacy: Where Is It?

I'm new to Facebook. I didn't like it before and I still don't like it. One of the reasons that I dislike it is its weird, absurd and abusive privacy laws.

I have no apps or games lurking in my profile. I'm part of 2 groups so far. The other day I wanted to join a fan-page, and I was shocked at the message that showed up:


I simply clicked a poll asking which Operating System I use. It asked me the following:
"Allowing Poll access will let it pull your profile information, photos, your friends' info, and other content that it requires to work.
Allow or cancel"

I find it very hard to understand why a poll application needs to pull my profile along my friends'! It's a stinky poll! All it could require is my name and whatever public information I've opted to share.

The fact that Facebook defaults to leaving every privacy option set to Public isn't enough deter people apparently.

I should note that even when you leave the fan-page, game or application, your information is still retained by the maintainers of that application. It is not deleted!

I haven't joined any games, and will not, because of such absurd privacy violations. Maybe if people paid enough attention, Facebook would actually do something about it. Hopefully. One day. Eventually?

Tuesday, September 8, 2009

Software RAID vs. LVM: Quick Speed Test

Table of Contents


Introduction

Currently, I have a fileserver that is setup this way:

Filesystem
      ^
Logical Volume Manager
      ^
Software RAID Arrays
      ^
Physical Disks

In my case, the LVM is an extra layer and it's not useful since I only have one physical entity that belongs to a Volume Group: A single RAID5 array.
So you could put your filesystem on top of a Logical Volume, or directly on the RAID array device. It depends on how you want to manage your data and devices.

So, is this hampering performance? The tables below will do the talking, but first: the setup.

System Setup

Processor
Intel Pentium Dual CPU E2160 @ 1.80GHz
MotherboardMSI (MS-7514) P43 Neo3-F

North Bridge: Intel P43

South Bridge: Intel ICH10
SATA Controller 1
JMicron 20360/20363 AHCI Controller

AHCI Mode: Enabled

Ports: 6-7
Sata Controller 2
82801JI (ICH10 Family) SATA AHCI Controller

Ports: 0-5
RAM
1GB @ CL 5
Video Card
GeForce 7300 GS
Disk sda
WDC WD10EACS-00D6B1
Disk sdb
WDC WD10EACS-00D6B1
Disk sdc
WDC WD10EACS-00ZJB0
Disk sdd
WDC WD10EADS-65L5B1
Disk sde
WDC WD10EADS-65L5B1
Disk sdf
MAXTOR STM31000340AS
Disk sdg
WDC WD10EACS-00ZJB0
Disk sdh
WDC WD10EADS-00L5B1
Disk sdi
Hitachi HDS721680PLAT80 (OS)
Chunk size
256kB
LVM: Physical Extent Size
1GB
LVM: Read ahead sectors
Auto (set to 256)

Speed Test Methods

A quick and easy way to run a speed test is by using a tool called hdparm and another called dd.
Note that these two utilities don't take the filesystem performance into account, as they read directly from the device, not a certain file. It doesn't matter in this case, as I'm about to show comparisons to show the magnitude of difference speed only, not show very exact results ;)

hdparm

hdparm -tT /dev/xxx
-t: Perform timings of device reads for benchmark and comparison purposes.
Displays  the  speed of reading through the buffer cache to the disk without any prior caching of data.
This measurement is an indication of how fast the drive can sustain sequential data reads under Linux, without any filesystem overhead.

-T: Perform timings of cache reads for benchmark and comparison purposes.
This displays the speed of reading directly from the Linux buffer cache without disk access.
This measurement is essentially an indication of the throughput of the processor, cache, and memory of the system under test.

dd

dd if=/dev/xxx of=/dev/null bs=10M count=400
This will read from the device and dump the data to a null device (just reading). Block size=10 Megabytes (2^20).
This will read 4GB of data. I specified 4GB to make sure that it surpasses the RAM size.

Before running dd, I flushed the read cache by entering: hdparm -f /dev/sd[a-h], which flushes the cache of all RAID disks.

Speed Test #1: RAID vs. LVM

LVM
root@Adam:~/mdadm-3.0# dd if=/dev/mapper/arrays-storage of=/dev/null bs=10M count=400
2097152000 bytes (2.1 GB) copied, 41.1147 s, 43.0 MB/s


root@Adam:~/mdadm-3.0# hdparm -tT /dev/mapper/arrays-storage
 Timing cached reads:   1926 MB in  2.00 seconds = 962.65 MB/sec
 Timing buffered disk reads:  146 MB in  3.00 seconds =  48.62 MB/sec
 
 
RAID
root@Adam:~/mdadm-3.0# dd if=/dev/md0 of=/dev/null bs=10M count=400
2097152000 bytes (2.1 GB) copied, 10.9341 s, 125 MB/s


root@Adam:~/mdadm-3.0# hdparm -tT /dev/md0
Timing cached reads:   1998 MB in  2.00 seconds = 998.73 MB/sec
Timing buffered disk reads:  538 MB in  3.01 seconds = 178.98 MB/sec

The above numbers are the average of 3 runs.

Speed Test #2: Disks Separately

root@Adam:~# for i in {a,b,c,d,e,f,g,h}; do dd if=/dev/sd"$i"1 of=/dev/null bs=10M count=400; done
root@Adam:~# for i in {a,b,c,d,e,f,g,h}; do hdparm -I /dev/sd"$i" | grep Firmware; done

Disk
Model
Firmware
Speed Test Result
sda
WDC WD10EACS-00D6B101.01A0146.3106 s, 90.6 MB/s
sdb
WDC WD10EACS-00D6B101.01A0148.6391 s, 86.2 MB/s
sdc
WDC WD10EACS-00ZJB001.01B0170.8184 s, 59.2 MB/s
sdd
WDC WD10EADS-65L5B101.01A0146.9733 s, 89.3 MB/s
sde
WDC WD10EADS-65L5B101.01A0144.2861 s, 94.7 MB/s
sdf
MAXTOR STM31000340ASMX15
77.1797 s, 54.3 MB/s
sdg
WDC WD10EACS-00ZJB001.01B0150.5498 s, 83.0 MB/s
sdh
WDC WD10EADS-00L5B101.01A0146.747 s, 89.7 MB/s

As you can see, though sdc & sdg have the same model and firmware, their speed differs! I have no clue why and I searched in Western Digital's website for firmwares to download, but their site leads no where to any firmware download link.

The Maxtor disk has a newer firmware released. I'll checkout its changelog before installing it. Also, as a precaution, I'll clone the Maxtor disk to sdg since it's not being used now; just in case the new firmware doesn't play nice!

Conclusion

From the above numbers, it's clear that LVM, in my setup, has crippled the performance by a huge margin (~66%). So for my next setup, I'm going to skip LVM and slap the filesystem directly on top of the RAID5 array.

On one of my PCs (Adrenalin), I already have XFS filesystem running on top of the RAID array and LVM is not being used. I get double the speed of hard disks out of the array (140 MB/s) when tested it last year with hdparm.

I don't claim that this is a typical problem of LVM. I did a quick search and didn't find numbers. I'm too lazy right now to find anything really. But I have the numbers on that MSI crap board (caused me so many problems with the SATA ports), and I'll skip LVM on that board. If I keep the board & not smash it to smithereens.

Irrelevant note: I'm loving posting to my blog through Google Docs.

Tuesday, September 1, 2009

Cheap Man's 40-Disk Storage Cluster


Table of Contents

Introduction

This is a computer case design that fits 40 disks, 4 motherboards, 5 power supplies, a bunch of fans and a gigabit switch.

The main goal of this design is to use the cheapest parts with the least effort to assemble everything. So you could say this is also Poor/Lazy Man's Storage Cluster!
The area used is 60x60x50 (WxDxH) cm only.

Keep in mind that this is a case not a whole system. I've only factored the price of the pieces used to put the case together.

Parts and Prices

Metal table with 2 net-like surfaces7 KDIKEA
2x Wooden CD rack that fits 35 CDs2x3 KDIKEA
Plastic drawer mat1.75 KDIKEA
Rubber grooved floor mat (3mm thick)1.5 KD for 0.5 meterTrueValue
Nylon Cable Ties (203x3.2mm)0.5 KDFamily Hardware Store
Total16.75 KD

Tools

  • Hands
  • Foot
  • Long nose pliers
  • Scissors
  • Hammer (or anything that hammers)

Design Diagram


In this diagram you see the measurements of each component and how they fit. When we put the disks inside the rack, there was an empty space of 4mm; we took care of that by using the rubber mat, which is 3mm thick on each side, totaling to 6mm, which helps holding the disks and serve as a shock absorber.

The disk rack is made of wood and we have rubber mats inside, so you'd expect for heat to be trapped. Our work around is this:
  • Choosing a rubber mat with grooves
  • Inserting the disks heads down having the 2.5cm edges touching the rubber
  • Leaving space between disks
  • Pushing the disks down till touching the metal table
  • Installing fans on the lower part of the table, blowing at the disks

Note that I have used Layout #1. Layout #2 was too cluttered and I didn't really think it through properly so I don't know if it's even possible. If you are able to squeeze more than 4 motherboards in that same table (or same dimensions), let me know!

Assembly

  1. Assemble lower shelf of table
  2. Use foot to break back-panel of CD racks
  3. Hammer the metal pins of the CD racks inwards
  4. Point the side that has the metal pins towards table surface (keeps wood fragments away from you)
  5. Tie the rack to the table using the cable ties
    Note: We assembled the upper surface but worked on the lower one later and kept the upper free for future motherboards.
  6. Cut 11 lines (in a group) of the rubber mat
  7. Attach the rubber mat to a side and tie it down. Do the same for the other side
    We have cut out the extra edges shown in the first picture to reduce heat contraption.
  8. If you want to have a separate power supply unit (PSU) for fans, attach it to the bottom of the lower surface
    Note: I'll tell you later how to turn on the PSU without a motherboard (jump-starting).If you're going to run anything at the bottom, now is the time to attach them. You won't be able to do it later on!
  9. Put the power supplies in place and tie them (make sure it's touching the metal table)
  10. Cut plastic mat to fit rest of table area and tie it to the table. Use the nail to punch holes
  11. Punch extra holes for the motherboards and don't tie the motherboards too hard!
  12. Tie fans below the disk rack(s) and connect them in serial to a PSU
    Note: We made a mistake above and tied the fans in the opposite direction of the motherboard and were too lazy to reposition them.
  13. Slap in the hard disk drives (HDDs) and hook them to the motherboard(s)
  14. Powering on
    To power on a motherboard, you could either use a power switch (or make one), or enable Wake-up On LAN (WOL) from the BIOS (assuming your motherboard supports it. You'd need to know the MAC address of your LAN port.
    We enabled WOL but it didn't work for some reason. Crappy MSI board.
  15. If your motherboard doesn't have a built-in video/graphics card, you'll need to bend the tip of the graphics card you're about to attach
  16. Almost done. Attach the upper surface and make sure that the rack is facing the opposite side to the one on the lower surface, so that the fans don't hit the cables

    Make sure to double check on the HDD cables after attaching the upper surface.
  17. Jump-starting a PSU
    I stripped a cable wrapper that had a metal piece inside it and stuck it in the proper pins. This way, I control the fan PSU using the ON/OFF switch at the back; no need for a separate power switch. Unfortunately we didn't take pictures of that, but here are some references:

To Cluster Or Not To Cluster

Now that you've had your motherboards all hooked up most likely to a gigabit switch, there are different ways to use all this storage capacity:
  1. Make them appear as a single storage unit
    This can be done through the use of iSCSI. It allows you to expose either each single hard disk or a whole RAID array as a single storage device to another machine over Ethernet. This way you can combine all the disks/arrays under one machine and create a LV (Logical Volume not Louis Vuitton) then the filesystem on top of the LV.
    I don't know how to do this on Windows. I can help you do this on Linux though. If you did this on Windows, drop me an email and I'll link your page.
  2. Use them separately
    Well this is a no-brainer: Just assign a different IP for each machine and expose each storage through Samba (on Linux) or share the directories on Windows.
  3. A mix between the above two
    Using iSCSI puts a lot of risk on the data because if one motherboard, or multiple disks fail (in case of using RAID5) then you lose all your data. For good. And since we have such a good history of increasing and managing the storage smoothly (NOT!), we decided to not use iSCSI. Maybe if we had a better history, we'd gone with it.

    What we're going to do is keep the existing Samba share and move the Anime directory (2.4TB) to another machine. We then mount the other machine using NFS over the existing Anime directory. Mounting a directory over another is called shadowing.
    For this to work properly, you need to create the usernames on all systems with the same IDs, otherwise you'll have a heck of a time with permissions.

    Now, the users still access the same old single IP and can still access all data, though distributed cross systems. If a machine's disks died, at least we won't lose all the data.

    We don't yet have the 2nd motherboard, so I'll write about this in detail when we get it and do the setup.

Post Assembly

After assembling and running the machine, it's been put under heavy load and these are the temperature readings:
/dev/sda: WDC WD10EACS-00D6B1: 27°C
/dev/sdb: WDC WD10EACS-00D6B1: 29°C
/dev/sdc: WDC WD10EACS-00ZJB0: 29°C
/dev/sdd: WDC WD10EADS-65L5B1: 28°C
/dev/sde: WDC WD10EADS-65L5B1: 29°C
/dev/sdf: MAXTOR STM31000340AS: 29°C
/dev/sdg: WDC WD10EACS-00ZJB0: 27°C
/dev/sdh: WDC WD10EADS-00L5B1: 26°C

This is way much better than before! They used to be in the 40's range!!

Last Words

Our baby is running fine now, and for the first time we haven't faced problems, thank God!

If you have any questions or comments, let us know. I suggest you subscribe via email when commenting, or leave a blank comment to just subscribe to stay posted on updates when adding the 2nd motherboard.

Good luck and don't blame us if you get electrocuted ^_^'

Saturday, August 22, 2009

HOWTO: Asterisk and FreePBX using PBX in a Flash

Table of Contents

Introduction
0) Requirements
1) Download the ISO file
2) Preparing the PC
3) Installation
3.1) Phase 1: From CD
3.2) Phase 2: From the Internet
4) Networking
5) Install latest patches and scripts
6) Passwords and System Administration
7) Prevent Being Blocked
8) Configuring Your PCI Card(s)
8.1) Configure PCI cards (Asterisk 1.4 + Zapata)
8.2) Configure PCI cards (Asterisk 1.6 + Dahdi)
9) Caller ID and Busy Detect Configuration
10) Updating Asterisk and FreePBX Modules
11) Tips and Tricks
12) Resources and References


Introduction


This is a guide (HOWTO) on how to install PBX in a Flash (PiaF) and do the initial hardware and software configurations required so that you could start doing your dialplans through the web-interface later on.

This HOWTO will not include steps on configuring extensions, trunks and the like. That will be in another post.

PiaF is a Linux distribution which makes installing and configuring Asterisk and FreePBX an easy task. It's similar to trixbox, only it has no history of security risks and trojans!

It's to be noted that PiaF downloads and compiles from source code. If you have no idea what that means, you'll find out later.

This is a dirty version of the guide. I couldn't get the styling to work properly.
Better versions: HTML Page or Google Document (PDF)
.

0) Requirements

  • PC: 800 MHz, 256MB RAM, 10GB disk space, CD-Drive, 1x free PCI slot, 1x network port.
  • Digium's TDM PCI card if you wish to make/receive calls from a landline.
  • Internet connection (needed during installation!!!).
  • DHCP Server (Preferred): If you have an Access Point that connects you to the Internet, it has the option already.
  • 1x Blank CD.
  • 1x Network cable.
  • 1x Switch.
  • Patience.


1) Download the ISO file


Get the ISO from: http://pbxinaflash.net/downloads/
If you have 4GB of RAM or more, grab the 64-bit ISO, otherwise stick to the 32-bit one. If you wish to venture into the 64-bit world, your processor has to be 64-bit capable.

Burn the ISO image using your favorite CD writing software. Make sure you choose the option to write an image, not put the ISO file in the CD as data!!!

2) Preparing the PC


Boot up your PC and enter the BIOS.
  • Make sure the time is correct! If you don't know the time in Kuwait, call 113. If the time is not correct in your computer, the installation will fail!
  • Somewhere in the menus there should be an option defining boot-sequence: Make sure that the CD-Drive is before the hard disk.


3) Installation


As mentioned before, you will need an Internet connection to proceed with the installation after installing the base packages from the CD. Also, you need a running DHCP server, so that your PBX box can obtain an IP during the installation process. If you have a router at home, chances are it has DHCP running already. It doesn't hurt to double check.

3.1) Phase 1: From CD


Boot the CD and follow the instructions:
  • To install Asterisk 1.4, press Enter. To install Asterisk 1.4 without Logical Volume Management, type ksalt. I chose ksalt.
  • Keyboard type: us
  • Time Zone Selection:
    • System clock uses UTC: No (Deselect)
    • Asia/Kuwait
  • Password: This is your system's password. Make sure it's alpha-numeric and at least 10 digits. The system's administrator username is: root. (Typical on *nix Operating Systems)


The installation process now continues for a while to install required packages from the CD. This would take about 10 minutes.

When the installation is over and the PC reboots, remove the CD. The hard disk will boot.

3.2) Phase 2: From the Internet


[if you know how to run a web-server on a normal PC, jump to the tricks section]

When the PC boots from the hard disk, a screen will come up asking you what to do. You should press A, to install the latest stable release of Asterisk 1.4.
  • Press A; download commences (30MB): http://pbxinaflash.net/ast14/pbx_load.tar.gz
    (Asterisk 1.6: http://pbxinaflash.net/ast16/pbx_load16.tar.gz)
    MD5 checksum: ecaa6b1bc5c9bf6bca3b086d22e7e4a5 pbx_load.tar.gz
    MD5 checksum: 46d7d6bb60fd2973fe37bd50b10ae7e1 pbx_load16.tar.gz
  • Installation of the package proceeds automatically. Just sit back and read the messages on the screen. Or not.
    DO NOT PRESS THE ENTER BUTTON! If the screen turns off when it idles, press an arrow key (right, left, up, down)

    Do not remove the network cable. The installation may require some extra packages during the installation.

    [i] It takes a long time because the file that was downloaded is the source code, and after downloading it, the installer script unpacks it then starts compiling the source to produce the binaries. Binaries are executable programs. The compilation process usually takes about 20 minutes on a Dual core CPU @ 3GHz.
  • The PC will reboot after the compilation is done.
  • After the PC has booted, you get to a login prompt, login with user: root, and the password you chose during installation.


4) Networking


You could leave your machine on DHCP, but you have to configure your DHCP server or Access Point to always assign the same IP to this machine.

I recommend that you could configure a static IP address in the machine itself by following these steps:
  • Type: netconfig
  • Would you like to set up networking? Yes
  • Deselect “Use dynamic IP” and fill in your network information.
  • Default gateway and primary name server are usually your Access Point's IP address.
  • Click OK and exit the menu.
  • Type: service network restart.
  • echo "nameserver xxx.xxx.xxx.xxx" > /etc/resolv.conf (replace the Xs with your IP)

In my case, even when setting the name server in the netconfig menu, it didn't get written until I do it manually or run netconfig again.

That's it. Now the IP is static to whatever you chose up there.

Now you should be able to reach the web interface on: http://<ip> -- but don't. We need to patch the files then configure some security options and passwords!

5) Install latest patches and scripts


You must not skip this step. It's essential to get things working!
  • In the shell, type: update-scripts
    This will bring up some boring text about the code and what's being installed.
    Press Enter and you see a list of more commands to use.
    Press Enter again and then press Y. This was just an agreement page and you're back to the shell.
  • Now run update-scripts again and press Y, to download the required stuff.
    This will download the files:
    http://www.pbxinaflash.org/ast14/files/securescripts.tar.gz
    http://www.pbxinaflash-scripts.com/ast14/files/pbx-scripts.tar.gz
    http://www.pbxinaflash-scripts.com/ast14/files/apache-auth.conf.gz

    97e8ccfbfd27f611e98ced4e8f791f95 securescripts.tar.gz
    52c9435c93eaa0dcadb9d83889145b2f pbx-scripts.tar.gz
    430207ba3db9eae8c7fde495a1815731 apache-auth.conf.gz
  • After that, it will tell you to type: update-fixes. Do it.
    Press Y to continue with the script. This will apply patches and security enhancements to your setup.

    It asks you later to press Enter, then set a password for the ARI interface. Use the same password used for the root user.
    It may take some time (even when it says thank you), so wait for it.

    If you wish to see the configurations, press Y, otherwise q.

In the future, if you want to update asterisk and related packages, type: update-source.

[i] For Asterisk 1.6: As of this writing, update-source16 doesn't work yet and the script asks to check the forums for a workaround for now.

[i] To see a list of all helpful commands, type: help-pbx.

6) Passwords and System Administration


Before venturing into the web interface, you have to change the default passwords!
Also, the main password script will ask if you would like to install Webmin, an application that allows you to administrate your Linux box through the web interface. I will not go with this option, to reduce the security risks.

Type: passwd-master

7) Prevent Being Blocked


There's a "security" application running on PBXiaF which if you enter the wrong password 3 times, will block your IP and lock you out of the PBX!!

I would suggest you disable it till you get the hang of things. Type: service fail2ban stop

[i] It will be re-enabled the next time you boot.
[i] The command disable-fail2ban may say that you don't have fail2ban installed, but when typing "status" it will show as running. This may happen on an Asterisk 1.6 setup.

If you wish to disable it for good, type: chkconfig fail2ban off

8) Configuring Your PCI Card(s)


Depending on which version you installed, follow the proper section.

8.1) Configure PCI cards (Asterisk 1.4 + Zapata)


In the shell, type:
amportal stop
genzaptelconf -vvvv

This will generate the file /etc/asterisk/zap-channels.conf which is automatically included by /etc/asterisk/zapata.conf

Now type:
amportal start

8.2) Configure PCI cards (Asterisk 1.6 + Dahdi)


root@pbx:/var/log/asterisk $ dahdi_genconf -vvv
Default parameters from /etc/dahdi/genconf_parameters
Generating /etc/dahdi/system.conf
Generating /etc/asterisk/dahdi-channels.conf
root@pbx:/var/log/asterisk $ dahdi_cfg -vsfd5
DAHDI Tools Version - 2.2.0
Line 9: fxsks=1
Line 10: echocanceller=mg2,1
Line 17: loadzone = us
Line 18: defaultzone = us


DAHDI Version: 2.2.0.2
Echo Canceller(s):
Configuration
======================
1 channels to configure.

About to open Master device

9) Caller ID and Busy Detect Configuration


We'll need to add these lines to the file: /etc/asterisk/zapata.conf
cidsignalling=v23 ;caller-id option
cidstart=polarity ;caller-id option
busydetect=yes ;busy tone detction
busycount=5 ;disconnect after 5 busy tones


nano /etc/asterisk/zapata.conf

Add the lines above under "hidecallerid" then to save the file: CTRL+X, Y, Enter.
Now type: amportal restart

10) Updating Asterisk and FreePBX Modules


Login to the web interface by directing your browser to http://<ip>
Slide the white bar at the bottom-left to the right and click on the admin link, then on the picture: "FreePBX Administration"
Username: maint
Password: What you chose with passwd-master


On the left panel, click Module Admin. Then on the right page, click Update. You should update your installed modules to get the latest stable versions.
You could after that install new modules.
The modules I installed were:
  • Announcements 2.5.1.8
  • Asterisk CLI 2.5.0.3
  • Asterisk Info 2.5.0.2
  • Backup & Restore 2.5.1.7
  • Blacklist 2.5.0.5
  • Callback 2.5.0.3
  • Call Forward 2.5.0.2
  • Call Waiting 2.5.0.1
  • Conferences 2.5.1.7
  • ConfigEdit 1.0
  • Day Night Mode 2.5.0.12
  • Do-Not-Disturb (DND) 2.5.0.6
  • Follow Me 2.5.1.8
  • FreePBX ARI Framework 2.5.2.3
  • FreePBX FOP Framework 2.5.0.1
  • Asterisk Logfiles 2.5.0.1
  • Misc Applications 2.5.0.4
  • Misc Destinations 2.5.0.3
  • Paging and Intercom 2.5.0.8
  • Print Extensions 2.5.0.5
  • Queues 2.5.4.8
  • Ring Groups 2.5.1.9
  • Sys Info phpsysinfo 2.5.3
  • Time Conditions 2.5.0.9


11) Tips and Tricks


If you know how to run a web-server on a local machine, you can minimize the time it takes to download the files (especially that their website can be slow at times).

You need to do two things:
  • Download the files mentioned above and put them in the proper location
  • Override DNS records for the domains the scripts use

  1. 1.In your default web-directory (/var/www) create these directories: mkdir -p /var/www/ast14/files
    Look at the links above and put them in the proper directory.
  2. 1.On your Asterisk box, type: nano /etc/hosts
    Add these entries:
    xxx.xxx.xxx.xxx     pbxinaflash.net
    xxx.xxx.xxx.xxx pbxinaflash.org
    xxx.xxx.xxx.xxx pbxinaflash-scripts.com

Replace the Xs with your web-server's IP.
At least now if you mess-up the installation and can save yourself the time it takes to redownload the files!

12) Resources and References

Security
http://nerdvittles.com/?p=580
http://secunia.com/advisories/34772/3/

PBX in a Flash
http://pbxinaflash.org/docs/InstallPBXInAFlash.pdf
http://pbxinaflash.net/docs/
http://knol.google.com/k/ward-mundy/pbx-in-a-flash/3uqc77rg9tgar/2#Getting_Started_with_PBX_in_a_Flash_1%282E%294
http://bestof.nerdvittles.com/scripts/
http://pbxinaflash.net/
http://pbxinaflash.net/downloads/
http://pbxinaflash.org/piafscripts/Asterisk+1.4

Passwords
http://www.freepbx.org/support/documentation/faq/changing-the-asterisk-manager-password
http://pbxinaflash.org/docs/InstallPBXInAFlash.pdf

Munin Reports
http://pbxinaflash.com/forum/showthread.php?t=978
http://munin.projects.linpro.no/wiki/Documentation
http://nerdvittles.kicks-ass.net/munin/

Hardware Config
http://www.trixbox.org/forums/trixbox-forums/open-discussion/2-3-0-10-problem-when-installing-not-automatically-detecting-m

Asterisk Config
http://www.voip-info.org/wiki/view/Asterisk+config+zapata.conf

FreePBX
http://www.freepbx.org/support/documentation/administration-guide

SIP Phone Recommendations
http://nerdvittles.com/index.php?p=207

Dahdi/Asterisk 1.6
http://bbs.openvox.cn/redirect.php?tid=788&goto=lastpost
http://forums.digium.com/viewtopic.php?p=122503&sid=dbc5a4bc9bec829d2e8d40f5d7dcea6e
http://www.mail-archive.com/asterisk-users@lists.digium.com/msg163600.html
http://forums.whirlpool.net.au/forum-replies-archive.cfm/529755.html
http://manpages.ubuntu.com/manpages/karmic/man8/fxotune.8.html

Tuesday, August 18, 2009

Ubuntu Mirror By QualityNet

The awesome guys 3baid, Bojacob and N. at QualityNet have done a great deal and created a mirror for Ubuntu.

I've been using it for the past few days and let me tell you, no more crappy bandwidth!!! Click the mirror link for details on how to add it.

Currently the mirror is an official mirror but not yet a mirror for Kuwait. They're working on that.

Kudos to you guys for the great work.

P.S.: The names are in alphabetical order.

Wednesday, August 12, 2009

Peer-to-Peer Phone Network

Introduction


I was standing in the bathroom washing my face this morning and I got this amazing idea*; an idea to revolutionize communications and reduce the cost of phone calls!

Imagine an anonymous phone network where you can create a number when you want, and dump the number when you want.
Imagine a phone network where you call and receive phone calls for free.
Imagine a phone network that allows you to block numbers for free.
Imagine a phone network where you have free voicemail and voicemail-to-email service.
Imagine a phone network that links all your numbers (p2p, GSM, landline) providing full reachability.

This is the: Peer-to-Peer Phone Network (PPPN: Pronounced: Pippin).


* A light-bulb didn't flash above my head, because it was morning and Tarsheed would've bludgened me to death with a bunch of old bulbs...

How Does It Work?


Still reading? Great! Let me explain how this works!

The Pippin Network consists of two parts: Nodes and Clients.

Nodes: A bunch of people buy a tiny computer that has customized free software packages on it. This PC is connected to a network that can reach the Internet. This PC is considered a node in the Pippin Network.

Clients: You have a PC, laptop, or a mobile phone with an Internet subscription. You download a free program on your phone that connects to the Pippin Network. Once you login to your extension/number, you reach any extension you want by going over the Internet through the Pippin Network.

That's it!

Originality


I spent the past 7-10 days setting up a PBX at home and just today I got this idea. I searched online on the concept and turns out there is a similar idea, but the implementation method is different. That idea was to have the mobile phones act as both the node and the client. This not the case with The Pippin Network.

Dependencies


Pippin Network relies on an existing GSM network by mobile phone carriers and on people donating bandwidth for people to call each other.

The reliance on the GSM network is actually good, because we mitigate the problem of having to figure out how to handle hand-offs, that is, when moving between Access Points. Since you're receiving your Internet through your carrier, your mobile is already handling hand-offs gracefully and guarantees almost zero down-time and full availability of the service.

To route and connect calls between clients (people), we need nodes with Internet connection. Node-providers (not owners) are donating free bandwidth. Since upload bandwidth is typically low (up to 512kbps only), it makes it more valuable and dissuade people from becoming node-providers, but there are workarounds; continue reading.

Is It Really Free?


Not quite. You need to have the following:
  1. Mobile phone/PC/Laptop

  2. Internet subscription from your carrier/ISP (Zain, Wataniya, Viva)

  3. Enough nodes to sustain the clients calling each other (idle ones don't count)


Legal Issues


Question: Voice-over-IP technology is banned from use in Kuwait. How will this work?!
Answer: VoIP is banned from being used for International calls. It's perfectly legal to use it within Kuwait.

Question: But calls are going over the Internet. You're providing International reach and it's illegal.
Answer: Wrong. Pippin network is designed to be restricted to Kuwait only. (See the technical section for details)

Question: What happens in cases of harassment and abuse?
Answer: What happens if I create an email and harass you?

Project Status


As of this writing, the project is still a draft that I'm working on. There are many of things to check and test existing software to see how to tweak it to see if it fits the project's needs.

Do I need help?
I sure can't pull this off on my own in a reasonable amount of time, if any. So I'd rather work with a team where each specializes in an aspect of the project, or at least is willing to learn about the aspect assigned.

This projects taps into the following concepts and fields:

  • Decentralized Networks

  • Telephony (Using Asterisk and SER) and VoIP

  • Dynamic DNS

  • Mobile Java


If you feel that you can aid to the project in any way (not necessarily in the above areas), contact me. If you don't hear from me with in 48-hours, post a comment here.

I also recommend that you post a comment here (even an empty one) and subscribe by email, if you wish to be updated on the status of the project.

Saturday, August 8, 2009

Asterisk PBX: Status on Version 1.6.x

As of this writing, the latest version is 1.6.2 and Dahdi version 2.2.0, and there's a standing bug for all cards using the driver: wctdm24xxp.

The cards using that driver are:
Digium TDM2400P/AEX2400: up to 24 analog ports
Digium TDM800P/AEX800: up to 8 analog ports
Digium TDM410P/AEX410: up to 4 analog ports

Bug symptoms:
You will be unable to make outgoing phone calls, until someone rings the line from outside, or if you remove the phone cable and plug it in again.

If you attempt to make an outgoing call, you'll receive an audio message from Asterisk saying: "All circuits are busy now"

Bug workarounds:
If you have compiled your own Asterisk 1.6, then you could apply the patches by the people in the link above.
Use jkroon's patch for Asterisk version 1.6.0.x, and tzafrir's patch for Asterisk 1.6.1.x or 1.6.2.x. You'll need to apply these patches to the source code, then recompile.

I will not be patching my Asterisk as I have no desire to compile Asterisk, to avoid going to fix other things (like Dahdi) in case it broke. So it's Asterisk 1.4 for me, for now.

* Dahdi is the replacement of Zaptel/Zapata. These are the telephony cards' drivers.

Wednesday, August 5, 2009

trixbox security concerns

WARNING: I want to alert everyone to NOT use trixbox due to security concerns.

I've been told by some guys in asterisk-related IRC channels that trixbox has known security problems and is not fixing them.

A quick search turns many results.

Security concerns include (but not limited to):
- Known security risks in their web-GUI and other packages but remain unpatched
- trixbox sends private information to its company without prior consent of users
- trixbox had history of installing scripts on the systems without prior notice of users

There are alternatives and I will document the installation process of one of them in a later post.

Alternatives are: AsteriskNow and PBX in a Flash.

Friday, July 24, 2009

Configuring Asterisk/trixbox for Kuwait


WARNING: I want to alert everyone to NOT use trixbox due to security concerns.

I've been told by some guys in asterisk-related IRC channels that trixbox has known security problems and is not fixing them.

A quick search turns many results.

There are alternatives and I will document their installation process in a later post.


Introduction


This post talks about how to setup a Private Branch Exchange (PBX) using an open-source solution called Asterisk. It's similar to solutions from Panasonic, Cisco, or Avaya for houses, offices or enterprises, only provides various features at very low cost.

What is Asterisk?


Asterisk is a software implementation of a PBX, that is, it's an application that runs on top of an Operating System. It allows you to receive and make phone calls over your telephone landlines (analog or digital) and over the network. And yes, it's free.

Why use it?


A small PBX from Panasonic that offers 2 input phone lines and about 8 extensions, with 6 phones comes around at 170 KD. You're limited to Panasonic's phones and you can't carry your extension outside the house (or wherever you implemented the solution). If you want wireless phones, you have to buy proprietary Access Points (APs) from Panasonic and if you have Wireless Access Points in your place, it's gonna look ugly to have 2 APs next to each other!

Asterisk works on standard network protocols and equipment. This means you can connect a computer, laptop, or a phone that uses the standard SIP protocol (newer mobile phone models support SIP, too!). This also means that if you have a wireless AP at home to distribute your Internet connection, you can buy a wireless phone which will work with Asterisk!

Another great option is that since it's all networked together, you can connect to your extension over the Internet. Say you implement Asterisk in your house, configure your mobile phone to connect to Asterisk, then anyone who calls you at home, will have the phone call sent to you over the Internet to your mobile phone!

What features does it offer?


Everything a normal PBX does, and more!
  • Voice mail

  • Voice mail to email

  • Conference calling

  • Interactive Voice Response (IVR) / phone menus

  • Automatic call distribution

  • Fax to email

  • Call queues

  • And more!

Check out the list on Asterisk's website.

What is trixbox?


trixbox (all in small letters) is an Asterisk-based distribution, that combines Asterisk and a few more packages to enhance the PBX functionality and experience.

I used both trixbox and AsteriskNow (another distro), but felt more comfortable with trixbox, and this post assumes the use of trixbox 2.6.2 Community Edition (CE) based on Asterisk 1.4 (1.6 exists but I haven't explored it as it seems to be still in beta).

trixbox also offers a business edition, as well as the original Asterisk. Feel free to visit their websites and explore the options.

Table of Contents


  1. Hardware Requirements and Configuration


    1. Addon Card

    2. Computer Specifications


  2. Download trixbox

  3. Installing trixbox

  4. Configuration


    1. Network Configuration

    2. Create An Extension

    3. General Settings

    4. Outbound Routes

    5. Trunks

    6. Inbound Routes

    7. Configuring Caller ID


  5. Applying Settings

  6. Installing a softphone

  7. Configuring Ekiga

  8. Notes

  9. Sources

  10. Image Index


1. Hardware Requirements and Configuration


Below are the required hardware specifications and addon cards. Read carefully!

1.1 Addon Card


To connect Asterisk to an analog phone line (Public Switched Telephone Network / PSTN, also known as Plain Old Telephone Service / POTS), you need a PCI card that converts signals from analog to digital and vice-versa.

Companies typically sell a base PCI card and pluggable modules. On Amazon.com, the base card from Digium is TDM410P and the module required to connect the machine to PSTN is called X100M.

The X100M enables what is called an FXO port. FXO port is the port you connect your PSTN line to. The other type of ports is called FXS; you connect analog phones to this port.
To easily remember these ports, follow this:
FXS -> Station -> Phone device.
FXO -> Office -> PSTN line.

A company called OpenVox offers the same base card and the FXO port for much less than Digium.

1.2 Computer Specifications


My test computer is a stretch to what I actually need for home. According to what I read online of previous implementations, each phone call requires 33MHz of CPU power. People were able to achieve 40 concurrent calls over an 800MHz processor with 256MB RAM!

My PC is a Pentium D 3.0GHz with 1GB RAM. Pentium D is dual core, so I have 6GHz at my disposal!
Initial installation takes 1.3GB only, so you could do fine with a 20GB hard disk for a home setup.

2. Download trixbox


trixbox has known security problems. USE AT YOUR OWN RISK! Alternatives are: AsteriskNow and PBX in a Flash.

I will post on how to install one of those in a later post.

Download trixbox CE here. Make sure to get the 2.6.x version as it's based on Asterisk 1.4.

3. Installing trixbox


After you download the ISO file, burn it on a CD as an image using your favorite burning software. Before proceeding with the installation, make sure you have installed the module on the base card and the card is plugged properly into the PCI port. Load the CD into the PC and boot up the CD.

By default, trixbox uses all disks in the computer; use "advanced" to make up your own partitioning, that is, when the CD boots, type "advanced" (without double quotes) and press enter.

Proceed with defaults unless otherwise specified below.

Upon reaching the partitioning stage, deselect disks that you don't want to be touched, and select: Remove all partitions & create default layout. (It's still safer to physically remove disks you don't want to be touched). Formatting the disk takes a long time. They use ext3 filesystem by default.

The password you type during setup is used to login to the machine later for any maintenance you may need (not required for web configuration). SSH is enabled by default, with root access.

4. Configuration


Skip section 4.1 if you have a router assigning dynamic IPs. If you wish to assign a static IP, then follow its steps.

4.1 Network Configuration


If you don't have a DHCP server running (A router that assigns IP addresses to devices on the network), define the IP manually by logging in to the terminal, using the username "root" (case sensitive!) and the password you chose during installation.

In the command prompt (shell), type: system-config-network
Press enter to select the proper device, then go to "Use DHCP" and press the space bar to deselect it and enable the other options.

Static IP: Make up an IP that is not used by any other device on the network.
Netmask: 255.255.255.0 should be a safe bet.
Default gateway IP: The IP of your router.
Quite to save.

When going back to the shell type: service network restart

Now you should be able to login to the web interface: http://<static ip>

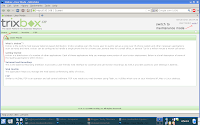
On the top-right, click the link "switch" -- user: maint, pass: password. [image1]

4.2 Create An Extension


You'll first create an extension for yourself to receive and make phone calls from using your computer.
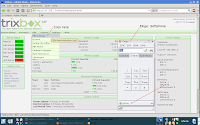
After you login, you'll reach the home page [image2]. Click on the PBX menu then choose "PBX Settings." Now you are at the System Status page [image3]. Click the Extensions link in the left menu, then select "Generic SIP Device" from the drop list and click "Submit" [image4].

SIP Device:
* User extension: 200 (safe bet. make sure you don't use a range of existing system extensions)
* Display name: Your name
* Secret: <alphanumeric>

* Vocie mail: Enabled
* Voicemail password: <numeric>
* Email: your full email address.
* Pager: Leave it blank
* Email attachment: Yes
* Play CID: Yes
[submit]

4.3 General Settings


* Ringtime Default: Reduced it to 5 seconds for testing
* Find users in the company directory: First or last
* Announce extension: Yes
* Country: United States (Default)
* 24-hour format: No (Changed it from Yes so that time service is said in AM/PM -- mom is not a fan of the 24 hour format)
* Check updates: No (Not a fan of background checking & installation...)
[submit]

4.4 Outbound Routes


This defines how you're going to call outside. The info below means that you dial 9 to get an external line, then it will dial the rest of the number.

* Default auto-created route: 0 9_outside: Details:
Password: left it blank
Dial patterns: 9|. (Default)
No need to submit as nothing has changed

4.5 Trunks


A trunk is a phone line (PSTN) in this case. In cases of using ISDN, it means having 30 lines at your disposal. The trunks page [image5] shows the available trunking options.

Auto created trunk: Trunk ZAP:
* Outbound Caller ID: Your phone number
* Never override: Checked
* Max channels: 1 (Since it's a phone line, it can make only one phone call at a time)
[submit]
Note that the above are not required, but recommended.

4.6 Inbound Routes


Where and how should incoming calls be treated. Remember, these are just basics to get things started.

I created a general rule for all phone numbers [image6]: Leave all fields blank & scroll down to "Set Destination"
* Select "Extension" and choose your extension (should be the only one for now)
[submit]
This will redirect all phone calls to your extension (for now)

4.7 Getting Caller ID to work


It doesn't work out of the box, and it requires that you have Caller ID (CID) service enabled by the Ministry of Communication!

I figured that since we had telephone lines way back, it's most likely similar to the British system, and what do you know, I was right! :D

PBX menu -> Config File Editor -> zapata.conf [image7]
Add these lines below threewaycalling

cidsignalling=v23 ;added manually: valid values: bell, v23, dtmf
cidstart=polarity ;added manually: valid values: usehist, ring, polarity

[Update]

5. Applying Settings


After you've done all this, there's an orange link at the top [image8], just below the menus, click it to save the new settings [image9] and then go to System menu -> System Maint -> Reset Now [image10] and [image11]. This will restart the Asterisk service and activate the new settings.

6. Installing a softphone


Now you just need to test it out with a softphone (software on a PC/laptop). I used Ekiga for my tests. You can download it for free here.
How can you not use this client, when they advertise their client with a picture of a cute girl?! ;p
Feel free to use any softphone you find suitable. The settings below should apply to any.

7. Configuring Ekiga


When you first run Ekiga, ignore/skip the initial account creation stuff. When the main window appears, go to Edit -> Accounts, then click on Account menu and add a SIP account:

Name: Display name
Registrar: The static IP you chose for trixbox
User: Your extension number
Authentication user: Your extension number
Password: the "secret: you chose while creating your extension
Timeout: Leave it at its default value.

If everything is fine, it will say that your account has been registered. Go to the web interface and click on PBX -> PBX Settings, and you'll see that you have 1 phone online.

8. Notes


* trixbox runs on CentOS, which is a RedHat Enterprise spin-off. RPMs will work fine with it.
* trixbox runs smartd and it did detect bad sectors on one of the disks!
* When the system boots, before using the web interface, memory usage is: 70MB. After doing the configurations over the web: 120MB.
* During a call from my laptop to my mobile over a landline, the CPU is 2% utilized. Memory usage didn't change.
* Asterisk writes a lot of data into its log files and they grow quite fast. Keep an eye at /var/log/asterisk/full
* In theory, each phone call requires 30-33MHz of CPU power, so a 3GHz CPU can handle 90 concurrent calls using G711 encoded audio. If you use A-law codec, you can achieve about 310 concurrent calls.
There are reports that have tested 700 concurrent calls on a Pentium4 2.5GHz + 2GB RAM machine. See Asterisk Dimensioning link below.

9. Sources and References


http://asteriskathome.sourceforge.net/handbook/#Section_5.2
http://forums.digium.com/viewtopic.php?t=75&sid=774813d31e64cb58ab179fe5b01de953
http://www.voip-info.org/wiki/view/Asterisk+and+UK+Caller+ID
http://www.ainslie.org.uk/callerid/cli_faq.htm#Q_6
http://www.voip-info.org/wiki/view/Asterisk+dimensioning
http://www.labnol.org/internet/design/add-text-captions-align-images-html-css/2309/

10. Image Index


Image 1: Login Screen

Image 2: Home
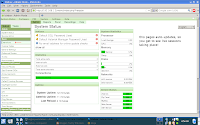
Image 3: System Status and PBX Settings
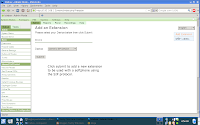
Image 4: Extensions
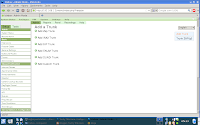
Image 5: Trunks
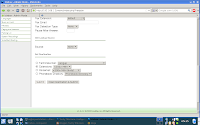
Image 6: Inbound Routes
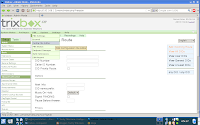
Image 7: Config File Editor
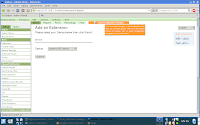
Image 8: Apply Settings
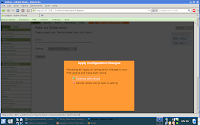
Image 9: Confirm Applying Settings
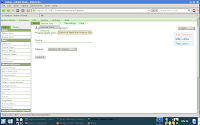
Image 10: System Maintenance
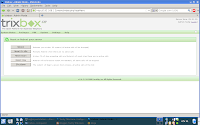
Image 11: Restarting Asterisk Service