Showing posts with label caller id. Show all posts

Saturday, August 22, 2009

HOWTO: Asterisk and FreePBX using PBX in a Flash

Table of Contents

Introduction
0) Requirements
1) Download the ISO file
2) Preparing the PC
3) Installation
3.1) Phase 1: From CD
3.2) Phase 2: From the Internet
4) Networking
5) Install latest patches and scripts
6) Passwords and System Administration
7) Prevent Being Blocked
8) Configuring Your PCI Card(s)
8.1) Configure PCI cards (Asterisk 1.4 + Zapata)
8.2) Configure PCI cards (Asterisk 1.6 + Dahdi)
9) Caller ID and Busy Detect Configuration
10) Updating Asterisk and FreePBX Modules
11) Tips and Tricks
12) Resources and References


Introduction


This is a guide (HOWTO) on how to install PBX in a Flash (PiaF) and do the initial hardware and software configurations required so that you could start doing your dialplans through the web-interface later on.

This HOWTO will not include steps on configuring extensions, trunks and the like. That will be in another post.

PiaF is a Linux distribution which makes installing and configuring Asterisk and FreePBX an easy task. It's similar to trixbox, only it has no history of security risks and trojans!

It's to be noted that PiaF downloads and compiles from source code. If you have no idea what that means, you'll find out later.

This is a dirty version of the guide. I couldn't get the styling to work properly.
Better versions: HTML Page or Google Document (PDF)
.

0) Requirements

  • PC: 800 MHz, 256MB RAM, 10GB disk space, CD-Drive, 1x free PCI slot, 1x network port.
  • Digium's TDM PCI card if you wish to make/receive calls from a landline.
  • Internet connection (needed during installation!!!).
  • DHCP Server (Preferred): If you have an Access Point that connects you to the Internet, it has the option already.
  • 1x Blank CD.
  • 1x Network cable.
  • 1x Switch.
  • Patience.


1) Download the ISO file


Get the ISO from: http://pbxinaflash.net/downloads/
If you have 4GB of RAM or more, grab the 64-bit ISO, otherwise stick to the 32-bit one. If you wish to venture into the 64-bit world, your processor has to be 64-bit capable.

Burn the ISO image using your favorite CD writing software. Make sure you choose the option to write an image, not put the ISO file in the CD as data!!!

2) Preparing the PC


Boot up your PC and enter the BIOS.
  • Make sure the time is correct! If you don't know the time in Kuwait, call 113. If the time is not correct in your computer, the installation will fail!
  • Somewhere in the menus there should be an option defining boot-sequence: Make sure that the CD-Drive is before the hard disk.


3) Installation


As mentioned before, you will need an Internet connection to proceed with the installation after installing the base packages from the CD. Also, you need a running DHCP server, so that your PBX box can obtain an IP during the installation process. If you have a router at home, chances are it has DHCP running already. It doesn't hurt to double check.

3.1) Phase 1: From CD


Boot the CD and follow the instructions:
  • To install Asterisk 1.4, press Enter. To install Asterisk 1.4 without Logical Volume Management, type ksalt. I chose ksalt.
  • Keyboard type: us
  • Time Zone Selection:
    • System clock uses UTC: No (Deselect)
    • Asia/Kuwait
  • Password: This is your system's password. Make sure it's alpha-numeric and at least 10 digits. The system's administrator username is: root. (Typical on *nix Operating Systems)


The installation process now continues for a while to install required packages from the CD. This would take about 10 minutes.

When the installation is over and the PC reboots, remove the CD. The hard disk will boot.

3.2) Phase 2: From the Internet


[if you know how to run a web-server on a normal PC, jump to the tricks section]

When the PC boots from the hard disk, a screen will come up asking you what to do. You should press A, to install the latest stable release of Asterisk 1.4.
  • Press A; download commences (30MB): http://pbxinaflash.net/ast14/pbx_load.tar.gz
    (Asterisk 1.6: http://pbxinaflash.net/ast16/pbx_load16.tar.gz)
    MD5 checksum: ecaa6b1bc5c9bf6bca3b086d22e7e4a5 pbx_load.tar.gz
    MD5 checksum: 46d7d6bb60fd2973fe37bd50b10ae7e1 pbx_load16.tar.gz
  • Installation of the package proceeds automatically. Just sit back and read the messages on the screen. Or not.
    DO NOT PRESS THE ENTER BUTTON! If the screen turns off when it idles, press an arrow key (right, left, up, down)

    Do not remove the network cable. The installation may require some extra packages during the installation.

    [i] It takes a long time because the file that was downloaded is the source code, and after downloading it, the installer script unpacks it then starts compiling the source to produce the binaries. Binaries are executable programs. The compilation process usually takes about 20 minutes on a Dual core CPU @ 3GHz.
  • The PC will reboot after the compilation is done.
  • After the PC has booted, you get to a login prompt, login with user: root, and the password you chose during installation.


4) Networking


You could leave your machine on DHCP, but you have to configure your DHCP server or Access Point to always assign the same IP to this machine.

I recommend that you could configure a static IP address in the machine itself by following these steps:
  • Type: netconfig
  • Would you like to set up networking? Yes
  • Deselect “Use dynamic IP” and fill in your network information.
  • Default gateway and primary name server are usually your Access Point's IP address.
  • Click OK and exit the menu.
  • Type: service network restart.
  • echo "nameserver xxx.xxx.xxx.xxx" > /etc/resolv.conf (replace the Xs with your IP)

In my case, even when setting the name server in the netconfig menu, it didn't get written until I do it manually or run netconfig again.

That's it. Now the IP is static to whatever you chose up there.

Now you should be able to reach the web interface on: http://<ip> -- but don't. We need to patch the files then configure some security options and passwords!

5) Install latest patches and scripts


You must not skip this step. It's essential to get things working!
  • In the shell, type: update-scripts
    This will bring up some boring text about the code and what's being installed.
    Press Enter and you see a list of more commands to use.
    Press Enter again and then press Y. This was just an agreement page and you're back to the shell.
  • Now run update-scripts again and press Y, to download the required stuff.
    This will download the files:
    http://www.pbxinaflash.org/ast14/files/securescripts.tar.gz
    http://www.pbxinaflash-scripts.com/ast14/files/pbx-scripts.tar.gz
    http://www.pbxinaflash-scripts.com/ast14/files/apache-auth.conf.gz

    97e8ccfbfd27f611e98ced4e8f791f95 securescripts.tar.gz
    52c9435c93eaa0dcadb9d83889145b2f pbx-scripts.tar.gz
    430207ba3db9eae8c7fde495a1815731 apache-auth.conf.gz
  • After that, it will tell you to type: update-fixes. Do it.
    Press Y to continue with the script. This will apply patches and security enhancements to your setup.

    It asks you later to press Enter, then set a password for the ARI interface. Use the same password used for the root user.
    It may take some time (even when it says thank you), so wait for it.

    If you wish to see the configurations, press Y, otherwise q.

In the future, if you want to update asterisk and related packages, type: update-source.

[i] For Asterisk 1.6: As of this writing, update-source16 doesn't work yet and the script asks to check the forums for a workaround for now.

[i] To see a list of all helpful commands, type: help-pbx.

6) Passwords and System Administration


Before venturing into the web interface, you have to change the default passwords!
Also, the main password script will ask if you would like to install Webmin, an application that allows you to administrate your Linux box through the web interface. I will not go with this option, to reduce the security risks.

Type: passwd-master

7) Prevent Being Blocked


There's a "security" application running on PBXiaF which if you enter the wrong password 3 times, will block your IP and lock you out of the PBX!!

I would suggest you disable it till you get the hang of things. Type: service fail2ban stop

[i] It will be re-enabled the next time you boot.
[i] The command disable-fail2ban may say that you don't have fail2ban installed, but when typing "status" it will show as running. This may happen on an Asterisk 1.6 setup.

If you wish to disable it for good, type: chkconfig fail2ban off

8) Configuring Your PCI Card(s)


Depending on which version you installed, follow the proper section.

8.1) Configure PCI cards (Asterisk 1.4 + Zapata)


In the shell, type:
amportal stop
genzaptelconf -vvvv

This will generate the file /etc/asterisk/zap-channels.conf which is automatically included by /etc/asterisk/zapata.conf

Now type:
amportal start

8.2) Configure PCI cards (Asterisk 1.6 + Dahdi)


root@pbx:/var/log/asterisk $ dahdi_genconf -vvv
Default parameters from /etc/dahdi/genconf_parameters
Generating /etc/dahdi/system.conf
Generating /etc/asterisk/dahdi-channels.conf
root@pbx:/var/log/asterisk $ dahdi_cfg -vsfd5
DAHDI Tools Version - 2.2.0
Line 9: fxsks=1
Line 10: echocanceller=mg2,1
Line 17: loadzone = us
Line 18: defaultzone = us


DAHDI Version: 2.2.0.2
Echo Canceller(s):
Configuration
======================
1 channels to configure.

About to open Master device

9) Caller ID and Busy Detect Configuration


We'll need to add these lines to the file: /etc/asterisk/zapata.conf
cidsignalling=v23 ;caller-id option
cidstart=polarity ;caller-id option
busydetect=yes ;busy tone detction
busycount=5 ;disconnect after 5 busy tones


nano /etc/asterisk/zapata.conf

Add the lines above under "hidecallerid" then to save the file: CTRL+X, Y, Enter.
Now type: amportal restart

10) Updating Asterisk and FreePBX Modules


Login to the web interface by directing your browser to http://<ip>
Slide the white bar at the bottom-left to the right and click on the admin link, then on the picture: "FreePBX Administration"
Username: maint
Password: What you chose with passwd-master


On the left panel, click Module Admin. Then on the right page, click Update. You should update your installed modules to get the latest stable versions.
You could after that install new modules.
The modules I installed were:
  • Announcements 2.5.1.8
  • Asterisk CLI 2.5.0.3
  • Asterisk Info 2.5.0.2
  • Backup & Restore 2.5.1.7
  • Blacklist 2.5.0.5
  • Callback 2.5.0.3
  • Call Forward 2.5.0.2
  • Call Waiting 2.5.0.1
  • Conferences 2.5.1.7
  • ConfigEdit 1.0
  • Day Night Mode 2.5.0.12
  • Do-Not-Disturb (DND) 2.5.0.6
  • Follow Me 2.5.1.8
  • FreePBX ARI Framework 2.5.2.3
  • FreePBX FOP Framework 2.5.0.1
  • Asterisk Logfiles 2.5.0.1
  • Misc Applications 2.5.0.4
  • Misc Destinations 2.5.0.3
  • Paging and Intercom 2.5.0.8
  • Print Extensions 2.5.0.5
  • Queues 2.5.4.8
  • Ring Groups 2.5.1.9
  • Sys Info phpsysinfo 2.5.3
  • Time Conditions 2.5.0.9


11) Tips and Tricks


If you know how to run a web-server on a local machine, you can minimize the time it takes to download the files (especially that their website can be slow at times).

You need to do two things:
  • Download the files mentioned above and put them in the proper location
  • Override DNS records for the domains the scripts use

  1. 1.In your default web-directory (/var/www) create these directories: mkdir -p /var/www/ast14/files
    Look at the links above and put them in the proper directory.
  2. 1.On your Asterisk box, type: nano /etc/hosts
    Add these entries:
    xxx.xxx.xxx.xxx     pbxinaflash.net
    xxx.xxx.xxx.xxx pbxinaflash.org
    xxx.xxx.xxx.xxx pbxinaflash-scripts.com

Replace the Xs with your web-server's IP.
At least now if you mess-up the installation and can save yourself the time it takes to redownload the files!

12) Resources and References

Security
http://nerdvittles.com/?p=580
http://secunia.com/advisories/34772/3/

PBX in a Flash
http://pbxinaflash.org/docs/InstallPBXInAFlash.pdf
http://pbxinaflash.net/docs/
http://knol.google.com/k/ward-mundy/pbx-in-a-flash/3uqc77rg9tgar/2#Getting_Started_with_PBX_in_a_Flash_1%282E%294
http://bestof.nerdvittles.com/scripts/
http://pbxinaflash.net/
http://pbxinaflash.net/downloads/
http://pbxinaflash.org/piafscripts/Asterisk+1.4

Passwords
http://www.freepbx.org/support/documentation/faq/changing-the-asterisk-manager-password
http://pbxinaflash.org/docs/InstallPBXInAFlash.pdf

Munin Reports
http://pbxinaflash.com/forum/showthread.php?t=978
http://munin.projects.linpro.no/wiki/Documentation
http://nerdvittles.kicks-ass.net/munin/

Hardware Config
http://www.trixbox.org/forums/trixbox-forums/open-discussion/2-3-0-10-problem-when-installing-not-automatically-detecting-m

Asterisk Config
http://www.voip-info.org/wiki/view/Asterisk+config+zapata.conf

FreePBX
http://www.freepbx.org/support/documentation/administration-guide

SIP Phone Recommendations
http://nerdvittles.com/index.php?p=207

Dahdi/Asterisk 1.6
http://bbs.openvox.cn/redirect.php?tid=788&goto=lastpost
http://forums.digium.com/viewtopic.php?p=122503&sid=dbc5a4bc9bec829d2e8d40f5d7dcea6e
http://www.mail-archive.com/asterisk-users@lists.digium.com/msg163600.html
http://forums.whirlpool.net.au/forum-replies-archive.cfm/529755.html
http://manpages.ubuntu.com/manpages/karmic/man8/fxotune.8.html

Friday, July 24, 2009

Configuring Asterisk/trixbox for Kuwait


WARNING: I want to alert everyone to NOT use trixbox due to security concerns.

I've been told by some guys in asterisk-related IRC channels that trixbox has known security problems and is not fixing them.

A quick search turns many results.

There are alternatives and I will document their installation process in a later post.


Introduction


This post talks about how to setup a Private Branch Exchange (PBX) using an open-source solution called Asterisk. It's similar to solutions from Panasonic, Cisco, or Avaya for houses, offices or enterprises, only provides various features at very low cost.

What is Asterisk?


Asterisk is a software implementation of a PBX, that is, it's an application that runs on top of an Operating System. It allows you to receive and make phone calls over your telephone landlines (analog or digital) and over the network. And yes, it's free.

Why use it?


A small PBX from Panasonic that offers 2 input phone lines and about 8 extensions, with 6 phones comes around at 170 KD. You're limited to Panasonic's phones and you can't carry your extension outside the house (or wherever you implemented the solution). If you want wireless phones, you have to buy proprietary Access Points (APs) from Panasonic and if you have Wireless Access Points in your place, it's gonna look ugly to have 2 APs next to each other!

Asterisk works on standard network protocols and equipment. This means you can connect a computer, laptop, or a phone that uses the standard SIP protocol (newer mobile phone models support SIP, too!). This also means that if you have a wireless AP at home to distribute your Internet connection, you can buy a wireless phone which will work with Asterisk!

Another great option is that since it's all networked together, you can connect to your extension over the Internet. Say you implement Asterisk in your house, configure your mobile phone to connect to Asterisk, then anyone who calls you at home, will have the phone call sent to you over the Internet to your mobile phone!

What features does it offer?


Everything a normal PBX does, and more!
  • Voice mail

  • Voice mail to email

  • Conference calling

  • Interactive Voice Response (IVR) / phone menus

  • Automatic call distribution

  • Fax to email

  • Call queues

  • And more!

Check out the list on Asterisk's website.

What is trixbox?


trixbox (all in small letters) is an Asterisk-based distribution, that combines Asterisk and a few more packages to enhance the PBX functionality and experience.

I used both trixbox and AsteriskNow (another distro), but felt more comfortable with trixbox, and this post assumes the use of trixbox 2.6.2 Community Edition (CE) based on Asterisk 1.4 (1.6 exists but I haven't explored it as it seems to be still in beta).

trixbox also offers a business edition, as well as the original Asterisk. Feel free to visit their websites and explore the options.

Table of Contents


  1. Hardware Requirements and Configuration


    1. Addon Card

    2. Computer Specifications


  2. Download trixbox

  3. Installing trixbox

  4. Configuration


    1. Network Configuration

    2. Create An Extension

    3. General Settings

    4. Outbound Routes

    5. Trunks

    6. Inbound Routes

    7. Configuring Caller ID


  5. Applying Settings

  6. Installing a softphone

  7. Configuring Ekiga

  8. Notes

  9. Sources

  10. Image Index


1. Hardware Requirements and Configuration


Below are the required hardware specifications and addon cards. Read carefully!

1.1 Addon Card


To connect Asterisk to an analog phone line (Public Switched Telephone Network / PSTN, also known as Plain Old Telephone Service / POTS), you need a PCI card that converts signals from analog to digital and vice-versa.

Companies typically sell a base PCI card and pluggable modules. On Amazon.com, the base card from Digium is TDM410P and the module required to connect the machine to PSTN is called X100M.

The X100M enables what is called an FXO port. FXO port is the port you connect your PSTN line to. The other type of ports is called FXS; you connect analog phones to this port.
To easily remember these ports, follow this:
FXS -> Station -> Phone device.
FXO -> Office -> PSTN line.

A company called OpenVox offers the same base card and the FXO port for much less than Digium.

1.2 Computer Specifications


My test computer is a stretch to what I actually need for home. According to what I read online of previous implementations, each phone call requires 33MHz of CPU power. People were able to achieve 40 concurrent calls over an 800MHz processor with 256MB RAM!

My PC is a Pentium D 3.0GHz with 1GB RAM. Pentium D is dual core, so I have 6GHz at my disposal!
Initial installation takes 1.3GB only, so you could do fine with a 20GB hard disk for a home setup.

2. Download trixbox


trixbox has known security problems. USE AT YOUR OWN RISK! Alternatives are: AsteriskNow and PBX in a Flash.

I will post on how to install one of those in a later post.

Download trixbox CE here. Make sure to get the 2.6.x version as it's based on Asterisk 1.4.

3. Installing trixbox


After you download the ISO file, burn it on a CD as an image using your favorite burning software. Before proceeding with the installation, make sure you have installed the module on the base card and the card is plugged properly into the PCI port. Load the CD into the PC and boot up the CD.

By default, trixbox uses all disks in the computer; use "advanced" to make up your own partitioning, that is, when the CD boots, type "advanced" (without double quotes) and press enter.

Proceed with defaults unless otherwise specified below.

Upon reaching the partitioning stage, deselect disks that you don't want to be touched, and select: Remove all partitions & create default layout. (It's still safer to physically remove disks you don't want to be touched). Formatting the disk takes a long time. They use ext3 filesystem by default.

The password you type during setup is used to login to the machine later for any maintenance you may need (not required for web configuration). SSH is enabled by default, with root access.

4. Configuration


Skip section 4.1 if you have a router assigning dynamic IPs. If you wish to assign a static IP, then follow its steps.

4.1 Network Configuration


If you don't have a DHCP server running (A router that assigns IP addresses to devices on the network), define the IP manually by logging in to the terminal, using the username "root" (case sensitive!) and the password you chose during installation.

In the command prompt (shell), type: system-config-network
Press enter to select the proper device, then go to "Use DHCP" and press the space bar to deselect it and enable the other options.

Static IP: Make up an IP that is not used by any other device on the network.
Netmask: 255.255.255.0 should be a safe bet.
Default gateway IP: The IP of your router.
Quite to save.

When going back to the shell type: service network restart

Now you should be able to login to the web interface: http://<static ip>

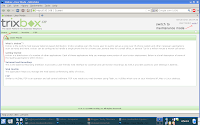
On the top-right, click the link "switch" -- user: maint, pass: password. [image1]

4.2 Create An Extension


You'll first create an extension for yourself to receive and make phone calls from using your computer.
After you login, you'll reach the home page [image2]. Click on the PBX menu then choose "PBX Settings." Now you are at the System Status page [image3]. Click the Extensions link in the left menu, then select "Generic SIP Device" from the drop list and click "Submit" [image4].

SIP Device:
* User extension: 200 (safe bet. make sure you don't use a range of existing system extensions)
* Display name: Your name
* Secret: <alphanumeric>

* Vocie mail: Enabled
* Voicemail password: <numeric>
* Email: your full email address.
* Pager: Leave it blank
* Email attachment: Yes
* Play CID: Yes
[submit]

4.3 General Settings


* Ringtime Default: Reduced it to 5 seconds for testing
* Find users in the company directory: First or last
* Announce extension: Yes
* Country: United States (Default)
* 24-hour format: No (Changed it from Yes so that time service is said in AM/PM -- mom is not a fan of the 24 hour format)
* Check updates: No (Not a fan of background checking & installation...)
[submit]

4.4 Outbound Routes


This defines how you're going to call outside. The info below means that you dial 9 to get an external line, then it will dial the rest of the number.

* Default auto-created route: 0 9_outside: Details:
Password: left it blank
Dial patterns: 9|. (Default)
No need to submit as nothing has changed

4.5 Trunks


A trunk is a phone line (PSTN) in this case. In cases of using ISDN, it means having 30 lines at your disposal. The trunks page [image5] shows the available trunking options.

Auto created trunk: Trunk ZAP:
* Outbound Caller ID: Your phone number
* Never override: Checked
* Max channels: 1 (Since it's a phone line, it can make only one phone call at a time)
[submit]
Note that the above are not required, but recommended.

4.6 Inbound Routes


Where and how should incoming calls be treated. Remember, these are just basics to get things started.

I created a general rule for all phone numbers [image6]: Leave all fields blank & scroll down to "Set Destination"
* Select "Extension" and choose your extension (should be the only one for now)
[submit]
This will redirect all phone calls to your extension (for now)

4.7 Getting Caller ID to work


It doesn't work out of the box, and it requires that you have Caller ID (CID) service enabled by the Ministry of Communication!

I figured that since we had telephone lines way back, it's most likely similar to the British system, and what do you know, I was right! :D

PBX menu -> Config File Editor -> zapata.conf [image7]
Add these lines below threewaycalling

cidsignalling=v23 ;added manually: valid values: bell, v23, dtmf
cidstart=polarity ;added manually: valid values: usehist, ring, polarity

[Update]

5. Applying Settings


After you've done all this, there's an orange link at the top [image8], just below the menus, click it to save the new settings [image9] and then go to System menu -> System Maint -> Reset Now [image10] and [image11]. This will restart the Asterisk service and activate the new settings.

6. Installing a softphone


Now you just need to test it out with a softphone (software on a PC/laptop). I used Ekiga for my tests. You can download it for free here.
How can you not use this client, when they advertise their client with a picture of a cute girl?! ;p
Feel free to use any softphone you find suitable. The settings below should apply to any.

7. Configuring Ekiga


When you first run Ekiga, ignore/skip the initial account creation stuff. When the main window appears, go to Edit -> Accounts, then click on Account menu and add a SIP account:

Name: Display name
Registrar: The static IP you chose for trixbox
User: Your extension number
Authentication user: Your extension number
Password: the "secret: you chose while creating your extension
Timeout: Leave it at its default value.

If everything is fine, it will say that your account has been registered. Go to the web interface and click on PBX -> PBX Settings, and you'll see that you have 1 phone online.

8. Notes


* trixbox runs on CentOS, which is a RedHat Enterprise spin-off. RPMs will work fine with it.
* trixbox runs smartd and it did detect bad sectors on one of the disks!
* When the system boots, before using the web interface, memory usage is: 70MB. After doing the configurations over the web: 120MB.
* During a call from my laptop to my mobile over a landline, the CPU is 2% utilized. Memory usage didn't change.
* Asterisk writes a lot of data into its log files and they grow quite fast. Keep an eye at /var/log/asterisk/full
* In theory, each phone call requires 30-33MHz of CPU power, so a 3GHz CPU can handle 90 concurrent calls using G711 encoded audio. If you use A-law codec, you can achieve about 310 concurrent calls.
There are reports that have tested 700 concurrent calls on a Pentium4 2.5GHz + 2GB RAM machine. See Asterisk Dimensioning link below.

9. Sources and References


http://asteriskathome.sourceforge.net/handbook/#Section_5.2
http://forums.digium.com/viewtopic.php?t=75&sid=774813d31e64cb58ab179fe5b01de953
http://www.voip-info.org/wiki/view/Asterisk+and+UK+Caller+ID
http://www.ainslie.org.uk/callerid/cli_faq.htm#Q_6
http://www.voip-info.org/wiki/view/Asterisk+dimensioning
http://www.labnol.org/internet/design/add-text-captions-align-images-html-css/2309/

10. Image Index


Image 1: Login Screen

Image 2: Home

Image 3: System Status and PBX Settings

Image 4: Extensions

Image 5: Trunks

Image 6: Inbound Routes

Image 7: Config File Editor

Image 8: Apply Settings

Image 9: Confirm Applying Settings

Image 10: System Maintenance

Image 11: Restarting Asterisk Service