Showing posts with label ssl. Show all posts

Wednesday, June 5, 2019

Windows 10 Shares Data with Microsoft Insecurely

Apart from the fact Windows 10 (Win10) is sending search data, even though I had disabled Cortana, it's also sending the data to Microsoft using certificates whose authenticity aren't proven.


First, Kaspersky intercepted this traffic going to: dubaivm1.uaenorth.cloudapp.azure.com
It's obviously owned by Microsoft. Details about its usage are in the Detailed Report below.

There's an additional connection that goes to: exo-ring.msedge.net
This is also related to Cortana search. (which is disabled)


These are details of the certificate. It's signed by DigiCert to Microsoft CA, then to: azwanp.trafficmanager.net


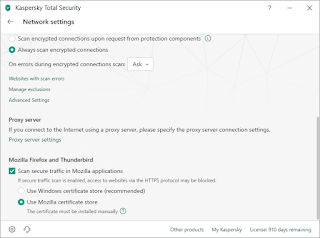
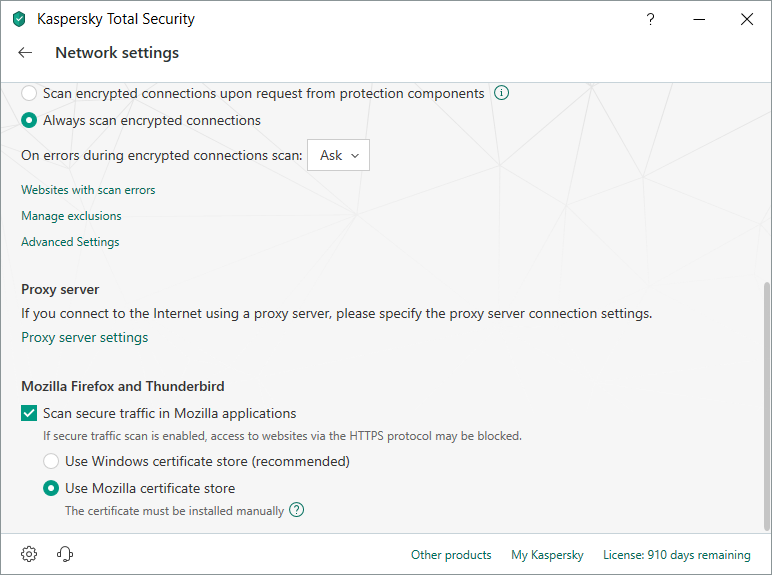
As extra precaution, I have Kaspersky set to use Mozilla's certificate store rather than Microsoft's.  At least I can trust that Mozilla won't inject stuff behind my back.


Saturday, February 6, 2016

NGINX with High Security Ciphers and LetsEncrypt

I want to move away from the bloated Apache web server and NGINX meets my requirements, but this time I want to use SSL/TLS with signed certificates with the highest security ciphers that support Perfect Forward Secrecy, because why not?

Sadly, the information was scattered and not everything is there in the manuals, so this is a documentation of what I've found and done in my setup.

The Let's Encrypt project provides authenticated and validated domain certificates for free! The catch? They expire every 90 days and their official client requires root access & dependencies, but you can (auto)renew and avoid these. Read on to know more.

Article Updates

  1. Mar 3rd
    1. Corrected root's crontab entry.
    2. Corrected headers' content and location
    3. Added more info about security and privacy headers

Environment

My setup consists of the stuff below. This post will presume Debian & NGINX are already installed. In the steps below, a line starting with "#" means it's a command you should type. Type the command without the "#" character (not necessarily as root).

  1. Debian Jessie (8)
    1. #cat /etc/issue
  2. NGINX version 1.6.2, installed from nginx-full package.
    1. #nginx -v
  3. OpenSSL 1.0.1k
    1. #openssl version
  4. Python 2.7.9
    1. python --version
  5. acme-tiny Dec 29, 2015
If you have an older version of openssl or nginx, you're likely to face problems and failures since new ciphers have been introduced in recent versions of OpenSSL only (1.0.1h) and the same for NGINX's settings. Make sure your distro supports the latest versions, otherwise you'll be leaving yourself and your visitors vulnerable.

Why acme-tiny?

The official letsencrypt client requires installing some dependencies such as gcc (GNU C Compiler) and some other things, in addition to requiring it being run as root, not only once, but as a daemon or in a cronjob as it requires to renew the certificate every 90 days!

As much as I appreciate the Let's Encrypt initiative, I'm not granting their software root access to my machines, nor installing gcc on a production machine. That's where acme-tiny comes in: a small (200 lines) client that is using Let's Encrypt API calls and you can (and should) audit the client's code before using it, since it's only 200 lines of human-readable Python code.

Configuring NGINX for TLS/PFS

SSL is dead. You should be using TLS only, and if you don't have to service old devices (Android 4.x, old IE browsers, Windows XP), then you should be using TLS v1.2 only with a strict set of ciphers.

Perfect Forward Secrecy (PFS) is an old standard but hasn't been widely adopted until after Snowden revealed the amount of encrypted data being stored for later decryption. PFS cycles the encryption key during the session, so even when a session is captured, decryption will be possible only for a small portion as the key changes.

TLS Config

If you're going to configure a wildcard certificate, place the config in /etc/nginx/nginx.conf. Otherwise if the certificate is unique to a specific domain/subdomain, you'll need to place the config in a virtual host config file.

In my case, I started with a wildcard but it self a self-signed certificate and was rejected by browsers, which is normal. Later when I made a Let's Encrypt certificate, I moved it to the specific subdomain.
Note: Let's Encrypt doesn't support wildcard certs as of this writing, however, they allow you up to 100 domains/subdomains.

Edit /etc/nginx/nginx.conf

user www-data;
worker_processes 4;
pid /run/nginx.pid;

events {
        worker_connections 256;
        multi_accept on;
}

http {

        ##
        # Basic Settings
        ##

        sendfile on;
        tcp_nopush on;
        tcp_nodelay on;
        keepalive_timeout 65;
        types_hash_max_size 2048;
        server_tokens off;

        # server_names_hash_bucket_size 64;
        server_name_in_redirect off;

        include /etc/nginx/mime.types;
        default_type application/octet-stream;

        ##
        # SSL Settings
        ##

        ssl_protocols TLSv1.2; # Dropping SSLv3, ref: POODLE
        ssl_prefer_server_ciphers on;
 # Change the cache name. Read the manual for more info.
        ssl_session_cache shared:YourSSLCacheNameHere:10m;
        ssl_session_timeout 10m;
        ssl_session_tickets off;
        ssl_stapling on;
        ssl_stapling_verify on;
 # contains CBC AES algs which I do not like
        #ssl_ciphers "EECDH+AESGCM:EDH+AESGCM:AES256+EECDH:AES256+EDH";
 # AES256 GCM is not yet supported on most browsers
        #ssl_ciphers 'ECDHE-RSA-AES256-GCM-SHA384';
        # TLS_ECDHE_RSA_WITH_AES_256_GCM_SHA384 & TLS_ECDHE_RSA_WITH_AES_128_GCM_SHA256
 ssl_ciphers "EECDH+AESGCM";
        ssl_ecdh_curve secp384r1;
 # self-generated 4096 DH key range
        ssl_dhparam /etc/nginx/ssl/dhparam.pem;

 # Put IPs of your hosting provider here, or a trusted DNS provider. These are Google's.
 resolver 8.8.8.8 8.8.4.4 [2001:4860:4860::8888] valid=300s;
        resolver_timeout 5s;

        # wildcard cert config should go here, if any
        #ssl_certificate /etc/nginx/ssl/;
        #ssl_certificate_key /etc/nginx/ssl/;

        ##
        # Logging Settings
        ##

        access_log /var/log/nginx/access.log;
        error_log /var/log/nginx/error.log;

        ##
        # Gzip Settings
        ##

        gzip on;
        gzip_disable "msie6";

        # gzip_vary on;
        # gzip_proxied any;
        # gzip_comp_level 6;
        # gzip_buffers 16 8k;
        # gzip_http_version 1.1;
        # gzip_types text/plain text/css application/json application/javascript text/xml application/xml application/xml+rss text/javascript;

        ##
        # Virtual Host Configs  
        ##

        include /etc/nginx/conf.d/*.conf;
        include /etc/nginx/sites-enabled/*;
}

Make sure you correct the line breaks if you paste. Due to styling on my blog, you may have one line spilling to multiple lines in the config, and this will break your config.

Don't worry about non-existing directories. We'll come to those later as we finish the setup.

Default Virtual Host Config

I don't use a default domain (www, for example) as mine are hidden from public. If you're like me, then this config fits you, otherwise move to the step below.

Edit /etc/nginx/sites-enabled/default

# Default server configuration
server {
 # change IP to match yours
        listen 127.0.0.1:80 default_server;
 # uncomment to enable IPv6
        #listen [::1]:80 default_server;
 # uncomment to enable ssl on IPv4
        listen 127.0.0.1:443 ssl default_server;
 # uncomment to enable ssl on IPv6
        #listen [::1]:443 ssl default_server;
        server_name _; #default server

        ssl_certificate /etc/nginx/ssl/default_wild.crt;
        ssl_certificate_key /etc/nginx/ssl/default_wild.key;

        root /var/www/html;

        # Add index.php to the list if you are using PHP
        #index index.html index.htm index.nginx-debian.html;
        index index.html;

        location / {
                # First attempt to serve request as file, then
                # as directory, then fall back to displaying a 404.
                try_files $uri $uri/ =404;
                autoindex off;
        }
}


This config will load when someone visits the IP(s) NGINX is configured at.

Virtual Host Config

This is where your subdomain config goes. In my case, the certificate belongs to this specific subdomain, so the certificate lines are added here. If you were using a wildcard cert, you should move them to nginx.conf above.

Create a file for your subdomain /etc/nginx/sites-available/mysubdom

server {
        listen 127.0.0.1:80;
 # uncomment if you want IPv6
        #listen [::1]:80;
        #listen 127.0.0.1:443 ssl;
        #listen [::1]:443 ssl;
        server_name subdomain.domain.com;
        keepalive_timeout 70;

        # The certificate is for subdomain.domain.com only
        #ssl_certificate /var/www/challenge/subdomain_chained.crt;
        #ssl_certificate_key /etc/nginx/ssl/subdomain.key;

        root /var/www/subdomain;

        # Add index.php to the list if you are using PHP
        #index index.html index.htm index.nginx-debian.html;
        index index.html;

        # letsencrypt challenge directory to verify domain
        location /.well-known/acme-challenge/ {
                alias /var/www/challenge/;
                try_files $uri =404;
 }

        location / {
                # First attempt to serve request as file, then
                # as directory, then fall back to displaying a 404.
                try_files $uri $uri/ =404;
                autoindex off; #enable if you want file listing
        }

}


Notice that listening for SSL/TLS is not yet enabled and the ssl_certificate line and the one below have a hash to comment it. This is required for the initial setup since we'll need to reload nginx and it'll fail since the files are not there yet. We'll enable these lines once everything is done.

To make this config file active by NGINX, you need to link it to sites-enabled:
ln -s /etc/nginx/sites-available/mysubdom /etc/nginx/sites-enabled/mysubdom

Create the directory for your subdomain to serve files:
mkdir /var/www/subdomain
mkdir -p /var/www/challenge/.well-known/acme-challenge
chown -R www-data:www-data /var/www/subdomain
chmod 775 /var/www/subdomain
chmod 771 /var/www/challenge

www-data is the user that NGINX runs as, as shown in the first NGINX config above. Don't worry about the challenge directory owner for now. It'll be taken care of later.

Private Keys and Certificates

The overall config is done. What's left is generating private keys, deriving a certificate for the subdomain, then finally working with Let's Encrypt client.

Create the directory /etc/nginx/ssl to place the subdomain private keys and other things in there:
mkdir /etc/nginx/ssl

Modify its permissions to be restricted to root and only those who know exactly which file to use:
chmod 751 /etc/nginx/ssl

Now inside the ssl directory, generate a 4096 bit Diffie-Hellman parameters file (prime numbers) to act as seeds for the PFS/TLS sessions (this will take a VERY LONG time):
openssl dhparam -out dhparam.pem 4096

Generate a self-signed certificate to be used for the default virtual host (i.e., not the one you care about). This will be served to anyone accessing the IP or any subdomain other than the one you specifically define in the virtual host:
openssl req -x509 -nodes -days 3650 -newkey rsa:4096 -sha512 -keyout /etc/nginx/ssl/default_wild.key -out /etc/nginx/ssl/default_wild.crt

If you don't configure this, users will be served your legitimate certificate and they'll be able to find your "hidden" subdomain. Only do the above if you want your domain/subdomain hidden.

Generate a subdomain private key and a certificate request:
openssl genrsa 4096 > subdomain.key
openssl req -new -sha512 -key subdomain.key -subj "/CN=subdomain.domain.com" > subdomain.csr

This one is the domain/subdomain that will be valid to the world. it can also be "domain.com" if you like.

Let's Encrypt and ACME-Tiny

For security purposes, it's best to have the client run as a separate user. Should anything go wrong in the future, its access would be quite isolated.

Environment Setup

Create a user for it:
useradd -m letsencrypt

Copy the subdomain csr file and set home directory permissions:
chmod 751 /home/letsencrypt
cp /etc/nginx/ssl/subdomain.csr /home/letsencrypt/
chown -R letsencrypt:letsencrypt /home/letsencrypt
chown -R letsencrypt:letsencrypt /var/www/challenge

Now switch user to become the letsencrypt user for the rest of the commands:
su - letsencrypt
openssl genrsa 4096 > account.key
wget https://raw.githubusercontent.com/diafygi/acme-tiny/master/acme_tiny.py
chmod 400 account.key
chmod 400 acme_tiny.py
chmod 400 subdomain.csr

The account.key is your private key to identify you to Let's Encrypt. Keep it safe!:
ls -l
-r-------- 1 letsencrypt letsencrypt 9150 Feb  6 12:13 acme_tiny.py
-r-------- 1 letsencrypt letsencrypt 3247 Feb  6 12:44 private.key
-r-------- 1 letsencrypt letsencrypt 1594 Feb  6 12:38 subdomain.csr

Now exit to be root (or you can use sudo) and restart nginx:
service nginx restart

If there are no errors here, it's all good, otherwise look into /var/log/nginx/error.log for hints.

Script Execution

Now that NGINX is functioning on port 80, it will be used to verify the subdomain ownership. acme-tiny writes to LetsEncrypt.org via APIs and they reply with a random hash that is written to the challenge directory, which is accessible via NGINX on port 80, and then LetsEncrypt.org checks that this hash actually exists at the subdomain you supplied and then verifies you.

su - letsencrypt
python acme_tiny.py --account-key account.key --csr subdomain.csr --acme-dir /var/www/challenge/ > /var/www/challenge/subdomain.crt

All should go OK without errors. If any, verify directory paths and file and directory permissions. Make sure the username "letsencrypt" has access to the files private.key, subdomain.csr and the challenge directory.

NGINX requires concatenating the intermediate certificate to the freshly signed certificate from Let's Encrypt:

wget -O /var/www/challenge/lets-encrypt-x1-cross-signed.pem https://letsencrypt.org/certs/lets-encrypt-x1-cross-signed.pem
cat /var/www/challenge/subdomain.crt /var/www/challenge/lets-encrypt-x1-cross-signed.pem > /var/www/challenge/subdomain_chained.crt

That's it! It should now work after enabling the SSL/TLS settings in NGINX.

Enable TLS in NGINX

Modify the file /etc/nginx/sites-enabled/mysubdom to make it look like this:
server {
        listen 127.0.0.1:80;
 # uncomment if you want IPv6
        #listen [::1]:80;
        server_name subdomain.domain.com;

 # force all traffic to go to HTTPS instead of HTTP
        return 301 https://subdomain.domain.com$request_uri;
}

server {
        listen 127.0.0.1:443 ssl;
        #listen [::1]:443 ssl;
        server_name subdomain.domain.com;
        keepalive_timeout 70;

        # The certificate is for subdomain.domain.com only
        ssl_certificate /var/www/challenge/subdomain_chained.crt;
        ssl_certificate_key /etc/nginx/ssl/subdomain.key;

        add_header Strict-Transport-Security "max-age=63072000; includeSubdomains; preload";
        add_header X-Frame-Options DENY; #or "SAMEORIGIN" always;
        add_header X-Content-Type-Options nosniff;
        add_header Content-Security-Policy 'default-src https://subdomain.domain.com:443';
        add_header X-Xss-Protection '1; mode=block';


        root /var/www/subdomain;

        # Add index.php to the list if you are using PHP
        #index index.html index.htm index.nginx-debian.html;
        index index.html;

        # letsencrypt challenge directory to verify domain
        location /.well-known/acme-challenge/ {
                alias /var/www/challenge/;
                try_files $uri =404;
 }

        location / {
                # First attempt to serve request as file, then
                # as directory, then fall back to displaying a 404.
                try_files $uri $uri/ =404;
                autoindex off; #enable if you want file listing
        }

}

Notice how listening on port 80 (HTTP) has been shifted to its own segment while the rest uses HTTPS exclusively. Future certificate renewals can also go over HTTPS as long as the certificate is still valid. If not, revert the config to be as it was at the beginning.

Reload NGINX to read the certificates and make the settings active:
service nginx reload

Note: Reload reads the settings again without dropping connections. It's advised for live websites.

About Headers

Previously, I had the security headers in the main nginx.conf file, but that will apply the same headers to all websites, and that's not scalable nor correct. According to Igor Sysoev (NGINX's creator), he created the config in NGINX to not inherit so that troubleshooting becomes simpler. Duplicating code is good because it makes life easy in finding the problem when things go wrong. See the link for his talk below in the references.

This means that headers (and other configs) should be repeated for every virtual host you configure. If you configure a header in the main block in nginx.conf then define another (or modified) header in the subdomain block, the latter will take over and the first one will be ignored.

About Security Headers

The SecurityHeaders service recommends using HTTP Public-Key Pinning (Stapling) or HPKP for short, but there are privacy and performance concerns with that: Pinning means the public key of your own certificate is sent in the header and is sent to your certificate issuer to validate it. This prevents a Man-in-the-Middle attack, but exposes your visit(s) to the certificate issuer! Additionally, it puts a huge burden on the certificate issuer to scale their own performance to reply to every single site visit. If they don't (and why should they?), your site visiting experience will suffer great delays.

The headers also tell the browser to cache your public keys for a very long period (3+ months) to protect you against forged certificates that could come during that period, but since we're using Let's Encrypt certificates which expire every 3 months, it'll become hectic to manage the headers, aging and other aspects.

With all these concerns, I decided against adding Public-Key Pinning headers in my config. It is up to you to evaluate your case. See the references below for more details about the available options for HPKP in addition to the Content-Protection policies and the XSS protection policies, as they may affect your site when you want to load media/material external to your website.

Auto-Renewing The Certificate

LetsEncrypt issues certificates valid for 90 days only to combat spam and fraudulent uses of domains that have been neglected. That means the certificate needs to be renewed before 90 days expire.

As the user "letsencrypt" put the following in a shell script letsencrypt_renew.sh:
#!/bin/bash
python acme_tiny.py --account-key /home/letsencrypt/account.key --csr /home/letsencrypt/subdomain.csr --acme-dir /var/www/challenge/ > /var/www/challenge/subdomain.crt || exit
wget -O /var/www/challenge/lets-encrypt-x1-cross-signed.pem https://letsencrypt.org/certs/lets-encrypt-x1-cross-signed.pem

cat /var/www/challenge/subdomain.crt /var/www/challenge/lets-encrypt-x1-cross-signed.pem > /var/www/challenge/subdomain_chained.crt

Make sure every command is complete and on its own line. The styling here could break them into multiple lines.

This should be run as a cron job so set the permissions:
chmod 744 letsencrypt_renew.sh

Now run # crontab -e and add this line:
# LetsEncrypt cert renewal -- nginx will be reloaded by root in another cron job
1 1 27 * * test $(($(date +\%m)\%2)) -eq 0 && /home/letsencrypt/letsencrypt_renew.sh

This will run the job every 2 months on the 27th day at 01:01 AM (even months of the year). Basically, every 60 days.

Now exit the user "letsencrypt" and as root, run # crontab -e and add this line:
# m h  dom mon dow   command
2 1 27 * * test $(($(date +\%m)\%2)) -eq 0 && `/usr/sbin/service nginx reload`

This will reload nginx at 01:02 AM, a minute after the certificate has been refreshed by the previous job.

Test Site Security and Settings

Now go to SSL Labs and test your website (https://subdomain.domain.com)


Then go to Security Headers and test your website (https://subdomain.domain.com)


References

I highly recommend visiting the sites below from bottom to top. I added them last to first in the order of pages I had on my tabs.

  1. ACME-Tiny client
  2. Cronjobs Every 2 Weeks
  3. Crontab Manual
  4. Code Beautifier
  5. OpenSSL CSR for NGINX
  6. Configuring HTTPS Servers
  7. Converting Rewrite Rules
  8. HTTP to HTTPS Redirection
  9. HTTPS Forced Redirection with Proxies
  10. Android 5.0 Supported Cipher Suites
  11. LightHttpd HTTPS Access
  12. Self-Signed Certificates
  13. Self-Signed Certificates on Ubuntu
  14. Self-Signed Certificates for Development
  15. Strong SSL/TLS Crypto in Apache and NGINX
  16. End of Life for Windows XP and SSL/TLS Configurations
  17. NGINX SSL Module
  18. Hardening Your Web Server's Ciphers
  19. How to Create a Self-Signed Cert
  20. Strong SSL Security on NGINX
  21. Pre-made Config for Strong Ciphers for Many Applications
  22. OCSP Stapling in Firefox
  23. Verifying a Certificate Against an OCSP
  24. NGINX Creator Talk About Scalable NGINX Config

Friday, July 19, 2013

HOWTO: Tor2Web on Debian

What is Tor2Web?

Tor2Web is an open source software that allows the general public to browse Tor hidden services, which are servers running anonymously behind the Tor network. These servers could be web servers, email servers or any other services, and are normally accessed only via the Tor software, but if for some reason you cannot install it, or need a quick look, tor2web provides this kind of easy access via standard web browsers.

Tor's hidden services (HSs) usually look like this http://sx3jvhfgzhw44p3x.onion (Wikileak's HS), but with tor2web, you can create a general public proxy where people enter the HS like this https://sx3jvhfgzhw44p3x.tor2web.org/ or bind your tor2web node to a specific HS (yours or someone else's) so that when someone accesses your tor2web domain name, it will only view your specific HS.

In all cases, Tor2Web cannot be used alone. You still need a 2nd node that has the HS running on it. This guide will not cover how to setup a HS. You can refer to Tor's guide for that. Never run both the HS & tor2web on the same node!

Why Use Tor2Web?

Tor2Web is part of a bigger project called GlobaLeaks, but one can use tor2web to provide access to banned/blocked material or provide services anonymously, not related to whistle-blowing, like an anonymous chat service. Taking down the tor2web node doesn't affect the HS & it's always easy to bring up a new tor2web node.

Another reason is to simply hide your stuff. With news of governments snooping on everyone and everything, one doesn't feel safe anymore. They could use anything against you at any point in the future. So, by running a HS, you can run your own email server or file server, and not worry about some law enforcement goons seizing your hardware and disrupting your work, even if you're collateral damage (like when Mega Upload servers were seized, many other websites were also affected).

Of course, one cannot attain full anonymity without taking all possible precautions such as registering the host/VPS/domain name using Tor to not be tracked to you, paying for the services using Bitcoins, and SSH into your system from behind Tor.

Requirements

  1. Debian Squeeze (6) or Wheezy (7)
  2. tor
  3. python2.7
  4. python-Twisted version 13.1.x
  5. tor2web
tor2web v3.0 uses Python Twisted as a webserver rather than a standalone webserver like Nginx.

Note: This guide has slight differences from the Tor2Web guide. Feel free to refer to both and modify as you please.

1) Debian

Some Virtual Private Server (VPS) providers do not support Wheezy, but tor2web needs packages only available in Wheezy. You will have to install a lot of packages from Wheezy to be able to use python2.7 and its requirements, but you don't need to run a dist-upgrade. So, in the end, your distribution will still be Squeeze.

If you're already running Wheezy, then you can simply ignore the parts about adding Wheezy's specific repositories and removing them later.

1.1) Initial Sources

Modify the file /etc/apt/sources.lst with your favorite editor (vi, vim, emacs, nano, pico)
deb http://ftp.uk.debian.org/debian             squeeze main contrib non-free
deb http://ftp.uk.debian.org/debian-security    squeeze/updates main contrib non-free
deb http://ftp.uk.debian.org/debian-backports squeeze-backports main
deb http://ftp.uk.debian.org/debian-backports squeeze-backports-sloppy main
deb http://deb.torproject.org/torproject.org squeeze main
deb http://dl.bintray.com/globaleaks/deb /

Replace "squeeze" with "wheezy" if that's what you're running, but ignore the backports lines as you don't need them.

Your sources above could be from a different mirror for Debian's packages. Always use the closest mirror to your host.

1.2) Upgrading the box

You need to be root to run these commands, or have "sudo" installed with the correct privileges.

The last command will upgrade your host to the latest packages of your distribution. It's always good to stay up to date and avoid buggy packages.

sudo apt-get update
sudo apt-get upgrade

1.3) Add Wheezy repositories

Modify the file /etc/apt/sources.lst with your favorite editor (vi, vim, emacs, nano, pico) again, and add Wheezy repos
deb http://ftp.uk.debian.org/debian             wheezy main contrib non-free
deb http://ftp.uk.debian.org/debian-security    wheezy/updates main contrib non-free

2) Tor

Import Tor's keyring to authenticate the packages and install Tor.

Note: If you're running as root, or you don't have sudo installed, simply remove "sudo" from the 2nd command above.

sudo apt-get update
sudo apt-get install debian-keyring debian-archive-keyring
sudo apt-get update

gpg --keyserver keys.gnupg.net --recv 886DDD89
gpg --export A3C4F0F979CAA22CDBA8F512EE8CBC9E886DDD89 | sudo apt-key add -

sudo apt-get install deb.torproject.org-keyring
sudo apt-get update
sudo apt-get install tor

Now you should have tor installed. You check the service status using: service tor status

3) Python

Check if you already have python installed and which version:
python --version
python2.7 --version

Now to install python and some of its fellow packages:
sudo apt-get install -t wheezy python2.7 python-pip python-dev wget ca-certificates

If you're running Squeeze, you'll be asked to also install glibc, and during the install you'll be asked to restart the services associated with it. If this is a fresh host, it's safe to say "Yes" if it's a production box with services running live, choose "No." This will also upgrade & install a lot of packages from Wheezy, as python-pip is dependent on them.

If you have multiple versions of python installed (2.6, 2.7 & 3.x), you'll need to change the default to 2.7:
update-alternatives --install /usr/bin/python python /usr/bin/python2.7 10

If you need to change the default later on, run this:
update-alternatives --config python

4) Tor2Web

First to grab the tor2web requirements and install them:
wget https://raw.github.com/globaleaks/GLBackend/master/requirements.txt
sudo pip install -r requirements.txt
sudo apt-get install tor2web
sudo service tor2web status
sudo service tor2web stop

Now that you have tor2web installed, and stopped, you need to create certificates for session encryption between the tor2web node and the user's browser.

when running the 2nd openssl command, make sure the Common Name (FQDN) is the same as the domain name that will be used to access the tor2web server. If you're planning to access it by IP, use the IP here.

The 3rd command will create a certificate valid for a year (365 days). If you want it to live longer, increase the number of days.

The last command will take a long time to generate the file. If your computer is faster than your host, run it on your computer then copy it there.

cd /home/tor2web/certs/
openssl genrsa -aes256 -out tor2web-key.pem 4096
openssl req -new -key tor2web-key.pem -out tor2web-csr.pem
openssl x509 -req -days 365 -in tor2web-csr.pem -signkey tor2web-key.pem -out tor2web-intermediate.pem
openssl dhparam -out tor2web-dh.pem 4096

Don't change the file names as tor2web is coded to use them as is.

The certificates created will require you to enter the password whenever you [re]start the tor2web service. This is good in case your server was hijacked & your certs were taken, they cannot be used unless someone knows the password (which shouldn't be the same as the root password!).

If you don't care, then you can create a certificate without a password:
openssl rsa -in tor2web-key.pem -out tor2web-key.pem.insecure
mv tor2web-key.pem tor2web-key.pem.secure
mv tor2web-key.pem.insecure  tor2web-key.pem

5) Configuring Tor and Tor2Web

Limit tor to the local host IP and prevent external connections, by modifying /etc/tor/torrc and add this line:
SocksPort 127.0.0.1:9050

Copy the example file into a new one:
cp /etc/tor2web.conf.example /etc/tor2web.conf

Modify /etc/tor2web.conf
nodename = whatever you want here. It can be the IP since it's unique

listen_ipv4 = IP of your VPS
listen_ipv6 = IP of your VPS, if you want to use IPv6
Change these to the IPs. If you don't want to bind by IPv6 or IPv4, comment the line out by adding a # sign at the beginning of the line. One of them must be present.

listen_port_http = 80
listen_port_https = 443
You cannot comment out http port, as tor2web will automatically redirect to https, but you can change the default ports.

basehost = this should be the root domain name (example.com not www.example.com or any subdomain, unless you happen to be running behind a subdomain). It can also be an IP. If you do not use the exact name/IP that the tor2web service will be accessed from, tor2web will not function.

Sockshost = 127.0.0.1
socksport = 9050
These should match the SocksPort config in /etc/tor/torrc file.

cipher_list = DHE-RSA-AES256-SHA
I do not trust the others, as DSS is not quite common and is only used by Microsoft for some reason, and RC4 can be misused at times.

mode = TRANSLATION
onion = hidden service name: name.onion (jntlesnev5o7zysa.onion - piratebay's HS)
blockcrawl = True
Using mode Translation means you'll bind tor2web to a specific hidden service defined in the onion option. If you want tor2web to function as a general proxy, leave the default options. The blockcrawl option blocks search engines.

I commented out the email notification options as I don't really care about notifications.

#mirror = ...
comment it out unless you happen to be running multiple tor2web nodes and want this one to list them in the banner.

6) Clean Up & Run the Services

If you're running Squeeze, remove the Wheezy main repo and only keep the security one to prevent upgrading the entire host to Wheezy.

Now run the tor2web service: (it will run tor for you)
service tor2web restart

You'll be asked to input the password of the certificate every time you [re]start the service, unless you have removed the password. Read the caution about it above.

It's always a good idea to NEVER ssh into your hidden service node using its real IP from your tor2web node. Should your tor2web node ever get seized or compromised, you do not want anyone looking at the logs or history to find the IP of your hidden service, as it won't hidden anymore.

7) Help

If you need my help setting up a HS, never contact me with your personal email and do not ask for help in the comments section. Create a fake email or use tormail.org. I don't want to know why you're setting it up or what kind of material you're hosting. The less I know, the better for the both of us.

You can ask anonymously on my blog about generic config or a problem you're having, but if you need specific help, send me an email with no details and then we'll agree on how to proceed.

8) Sources

Thursday, September 1, 2011

SSL Certificates Stolen

The issue of DigiNotar's breach keeps getting worse; Computer World writes that over 200 SSL certificates have been generated & stolen, signed for Google, Yahoo, Mozilla, Tor Project among many others.

Google & Mozilla have updated their browsers to remove the affected certificates/invalid signatures, but in the latest build of Chrome on Linux (13.0.782.218) I still see DigiNotar as a CA.

I suggest you delete DigiNotar from all your browsers as it's not worthy of trust at the moment. Remember, if you update your browser, double check its existence as it may be added again by the update.

Friday, July 23, 2010

Secure Connections to Facebook

For the past 2 days I was plagued with constant blank pages whenever trying to visit Facebook. I tried adding an "s" to http://facebook.com and viola! It opened!

I was surprised because I did try that a few months back and it didn't work, which made me think: Why isn't Facebook advertising the fact that it supports SSL?! I certainly wouldn't want my corporate admins to be snooping on my status updates or picture uploads/views!

But since this is Facebook, there's yet another disappointment: They use full URLs rather than relative ones. This means that when you click a link to comment or a profile, you'll be sent using HTTP and not HTTPS (no security/encryption). That's retarded.

Thankfully, there's an addon for FireFox called Force-TLS which forces the use of HTTPS even when the link you're being redirected to is HTTP.